Ir al contenido principal

How to Automatically Email a Report in Sage Enterprise Management (Sage X3)

How to Automatically Email a Report in Sage Enterprise Management (Sage X3)
During the implementation cycle, we’re often asked if we can set it up so a company can automatically email a report in Sage Enterprise Management (Sage X3) – sales order confirmations when someone places an order, for example, or confirmation invoices when goods are shipped.

By leveraging the destination management and workflow capabilities of Enterprise Management, it’s very possible – easy, in fact – to set it up so that you can click just one button and send an automatically generated email.


As an example, we’ll try to create an environment where we can simultaneously create the invoice from the delivery screen and email the confirmation to our customer.

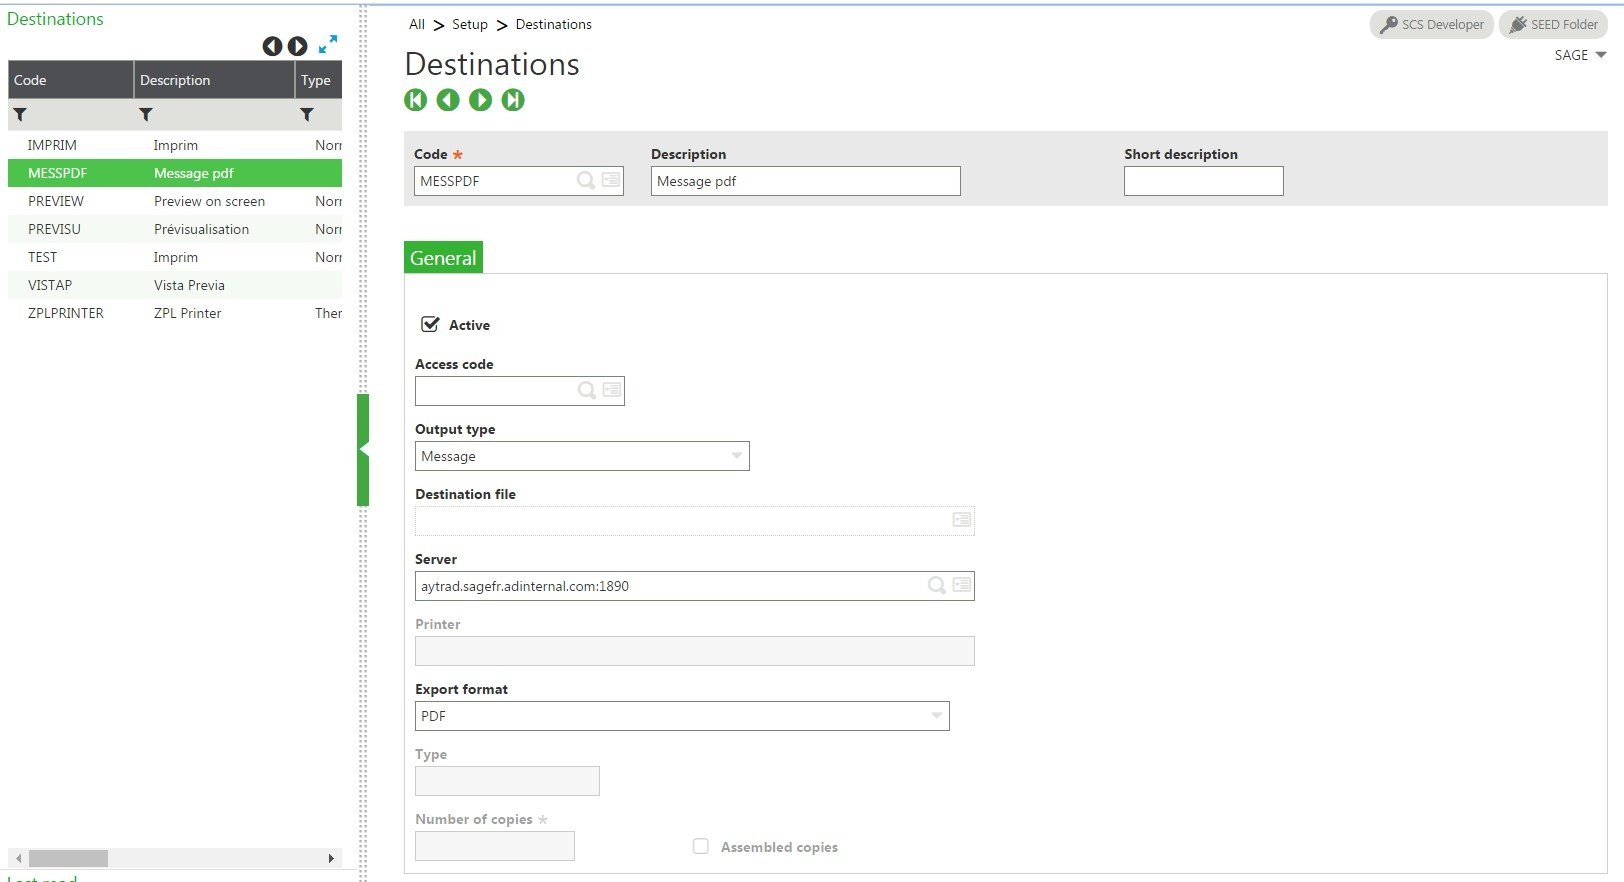
First, you’ll have to create the email destination and make sure that the parameters are configured to be able to email within the parameter values.

email a report in Sage Enterprise Management (Sage X3)

This is where you’ll define the email server IP or mask.


email a report in Sage Enterprise Management (Sage X3)


Second, you must define a new report code and its default values. This will allow you to specify which print destination to use.

email a report in Sage Enterprise Management (Sage X3)


Note that you can also do that using the destination by user functionality.
These are the default values under setup > destinations > default values.


email a report in Sage Enterprise Management (Sage X3)


Next, create the print code for this new report code. Please make sure that it allows for direct print, as that bypasses the print parameters screen and assumes you’ll use all the default print parameters.


email a report in Sage Enterprise Management (Sage X3)


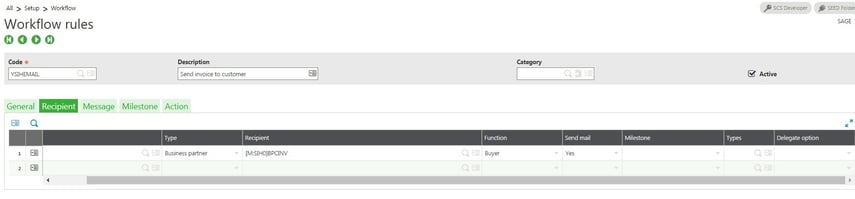
You’ll also need to configure the workflow rule and the entry transaction to allow each action to be automated.

email a report in Sage Enterprise Management (Sage X3)


workflow rules 2.jpg


email a report in Sage Enterprise Management (Sage X3)


And the entry transaction setup as follows:

The only setup you need to worry about is the report code and the auto print flag.
To get this to work with just one click, you need to have only one entry transaction set up. Otherwise, you’ll have to pick the appropriate transaction code before it gets sent.


email a report in Sage Enterprise Management (Sage X3)


Now, as soon as you click on the invoice button from the delivery function, it will automatically pop up the print parameters as well as an email to the contact with the buyer function from this specific customer when you choose to print.


email a report in Sage Enterprise Management (Sage X3)


It will automatically attach the document to the email like this:

email a report in Sage Enterprise Management (Sage X3)


Entradas populares de este blog

Valores de fstat

Fstat fstat  is a numeric status that is returned upon execution of a database operation, a sequential file operation, or a lock instruction. Syntax fstat Examples # MYTABLE is a table with a key called KEY1, that has a unique component called KEYVAL # Create a record in the table MYTABLE with they key value 1 if it doesn't exist Local File MYTABLE [MYT] Read [MYT]KEY1=1 If fstat [MYT]KEYVAL=1 : Write [MYT] If fstat MSG="The key was created in the mean time" Else MSG="Key created" Endif Else MSG="Key already exists" Endif Details fstat  is always set to '0' if the operation is successfully completed, and has a non-null value if there is an error: In a sequential read ( Getseq  and  Rdseq ),  fstat  is set to '1' at the end of the file. On  Lock ,  fstat  is set to '1' if the lock could not be performed. For a database operation ( Read ,  Look ,  Readlock ,  For ,  Write ,  ...

SAGE X3 SILENT IMPORT (IMPORTSIL) WITH ERROR CATCHING

FUENTE ORIGINAL: https://pluginx3.com/en/blog/post/sage-x3-silent-import-importsil-with-error-catching.html You already know how to manually generate a CSV file in order to import it threw a template in Sage X3. But If you wonder how to catch detailed errors after a silent import here is the solution. Sometimes you need to catch the incoming errors in order to alert the end-user regarding an issue. Closed period, wrong date etc …. Unfortunalty the standard Sage X3 silent import function doesn’t natively show the detailed errors during the import process. Call IMPORTSIL([M:IMP2]MODIMP,[M:IMP2]NOMIMP) From GIMPOBJ And the standard function ERR_IMPORT will only show the overall status of the importation and not the detailed errors. IMPORTSIL function is pushing all the log data into a tracefile in order to avoid any popup on end-user screen. So you have a log file available in order to search for errors in it. Sage X3 runtime is using the same principals standards as any shell for log...

Sage X3 Create a new CLOB Text

Here how to create a CLOB text Funprog F_CRELOB ( YABRFIC , YTEXTE ) Value Char YABRFIC Value Char YTEXTE Local Char XXRTFTXT ( 250 ) ( 3 ) XXRTFTXT ( 0 ) = "{\rtf1\ansi\ansicpg1252\deff0\deflang1033{\fonttbl{\f0\fswiss\fprq2\fcharset0 MS Sans Serif;}}\viewkind4\uc1\pard\f0\fs17 " XXRTFTXT ( 1 ) = YTEXTE XXRTFTXT ( 2 ) = "\par}" Local Char X_RET Local Integer XXOK Local Char XCHAMPLIEN : XCHAMPLIEN = "YYYY" Global Char YYYY : YYYY = YABRFIC Local Clbfile WWCLOB Local Mask ACLOB [ M :ACL ] Setlob WWCLOB With XXRTFTXT [ M :ACL ] CLOB = WWCLOB Call CRE_CLOB_ACL ( XCHAMPLIEN , XXOK ) From TRTX3TEX Close Local Mask [ M :ACL ] X_RET = YYYY Kill YYYY End X_RET