Ir al contenido principal

Cómo personalizar las imágenes de la página de inicio/login de Sage X3


en Cómo personalizar las imágenes de la página de inicio/login de Sage X3

Fuente: http://www.consultorerp.es/sage-x3/como-personalizar-las-imagenes-de-la-pagina-de-iniciologin-de-sage-x3/

En la pantalla o página de inicio de Sage X3, cuando nos disponemos a hacer  ‘login’, aparecen una serie de imágenes.  Hoy vamos a ver cómo personalizar las imágenes de esa pantalla de manera que puedas poner cualquier otra imagen que desees, como el logotipo de la empresa por ejemplo.
Si vemos el código fuente de la página en cuestión observaremos cómo la imagen que aparece al hacer login es escogida de manera aleatoria entre una lista de ocho que están ubicadas en la ruta bin\node_modules\syracuse-ui\themes\desktop\sage\images\login
Así pues, podemos modificar esas imágenes sin necesitar de tocar el código de la web.
En una instalación donde SafeX3 se encuentre en la carpeta predeterminada c:\Sage\SafeX3\, la ruta completa de las imágenes de login sería
c:\Sage\SafeX3\Syracuse\syracuse\bin\node_modules\syracuse-ui\themes\desktop\sage\images\login
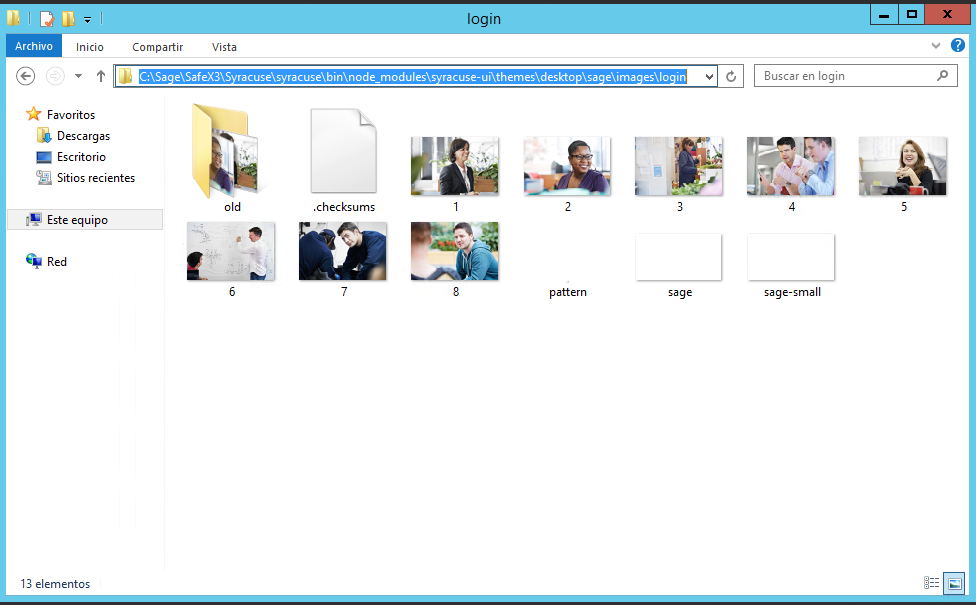
Ruta donde están las imágenes
Ahí nos encontraremos las ocho imágenes entre las que se selecciona aleatoriamente, así como el patrón (pattern) que a modo de filtro se superpone sobre ellas.  Si haces una copia de las ocho imágenes (por si las vuelves a necesitar), y sustituyes esas imágenes por las de tu elección, tendrás una pantalla de inicio al gusto de los usuarios.
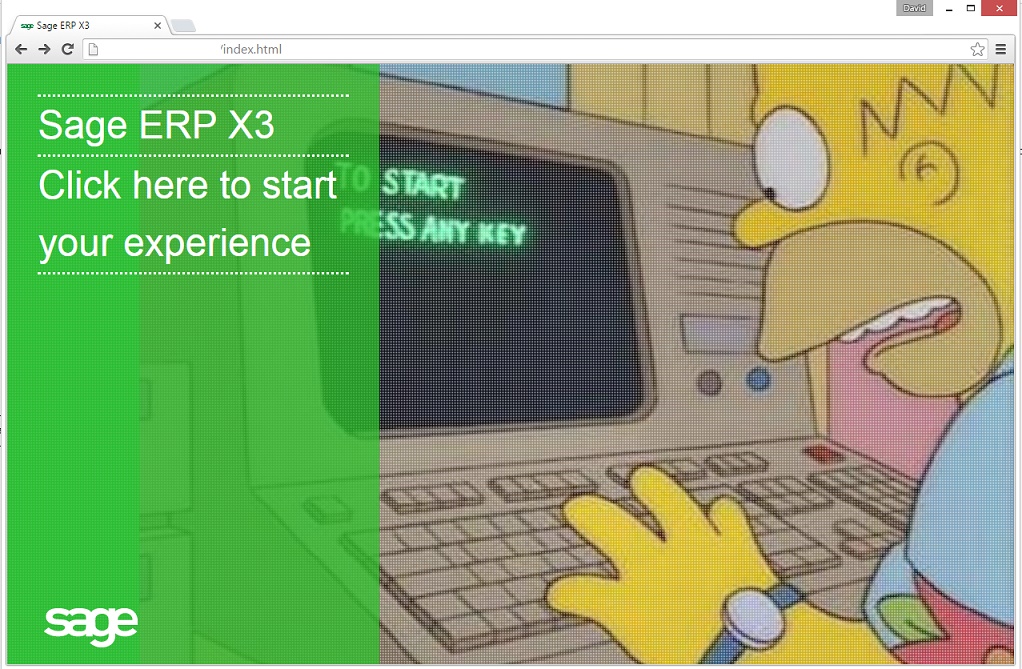
Pantalla de inicio personalizada
Navegando por algunas de las subcarpetas por las que hemos pasado para llegar hasta aquí, encontrarás otras cosas que puedes modificar (por ejemplo, el ‘favicon‘).  Como siempre, ¡toca con cuidado!. 

Entradas populares de este blog

SAGE X3 SILENT IMPORT (IMPORTSIL) WITH ERROR CATCHING

FUENTE ORIGINAL: https://pluginx3.com/en/blog/post/sage-x3-silent-import-importsil-with-error-catching.html You already know how to manually generate a CSV file in order to import it threw a template in Sage X3. But If you wonder how to catch detailed errors after a silent import here is the solution. Sometimes you need to catch the incoming errors in order to alert the end-user regarding an issue. Closed period, wrong date etc …. Unfortunalty the standard Sage X3 silent import function doesn’t natively show the detailed errors during the import process. Call IMPORTSIL([M:IMP2]MODIMP,[M:IMP2]NOMIMP) From GIMPOBJ And the standard function ERR_IMPORT will only show the overall status of the importation and not the detailed errors. IMPORTSIL function is pushing all the log data into a tracefile in order to avoid any popup on end-user screen. So you have a log file available in order to search for errors in it. Sage X3 runtime is using the same principals standards as any shell for log...

Valores de fstat

Fstat fstat  is a numeric status that is returned upon execution of a database operation, a sequential file operation, or a lock instruction. Syntax fstat Examples # MYTABLE is a table with a key called KEY1, that has a unique component called KEYVAL # Create a record in the table MYTABLE with they key value 1 if it doesn't exist Local File MYTABLE [MYT] Read [MYT]KEY1=1 If fstat [MYT]KEYVAL=1 : Write [MYT] If fstat MSG="The key was created in the mean time" Else MSG="Key created" Endif Else MSG="Key already exists" Endif Details fstat  is always set to '0' if the operation is successfully completed, and has a non-null value if there is an error: In a sequential read ( Getseq  and  Rdseq ),  fstat  is set to '1' at the end of the file. On  Lock ,  fstat  is set to '1' if the lock could not be performed. For a database operation ( Read ,  Look ,  Readlock ,  For ,  Write ,  ...

How To Add a Custom Selector for the Screen Field

Fuente original del artículo:   https://www.rklesolutions.com/blog/how-to-add-a-custom-selector-for-the-screen-field January 5, 2022 By RKL Team Leave a Comment There may be times when you want to add a pop-up window to select a field for a screen. Sometimes this can be handled automatically if the field is a standard X3 object field (i.e. when selecting a product with a type of ITM from the ITMMASTER table). There may be other times where a standard look-up is not available, and some custom code is required to do the selection window. We'll show you how to add a custom selector of your choosing to the screen field. ADD SELECT ON SCREEN FIELD The first step is to add the appropriate code to the field on the screen in Sage X3: Go to  Development > Script Dictionary > Screens Select Your Screen Select the field to have the lookup for  by moving your cursor to it on the screen. The field should show with a blue background. Select a type of "Selection" , and an  ac...