Ir al contenido principal

How to setup a workflow to email invoice to customer contact?


It's true that Sage ERP X3 has some number of add ons that you can take advantage to streamline emailing your documents to your customers, such as Sage ERP X3 EDD, EDM, PIA, but in standard Sage ERP X3, a workflow can be setup to email a single document like a Sales order invoice to a customer in an automatic way, by following below steps. (Screen shots are from V7)

  1. Open Setup, General parameters, Parameter values.
  2. Expand SUP chapter and click on Action button for the WRK Group.
  3. Verify that you have an email server entered for parameter SERMES.
  4. Click OK.
  5. Click on Action button for RPT Group.
  6. Verify that ASAIDEST parameter is set to No.
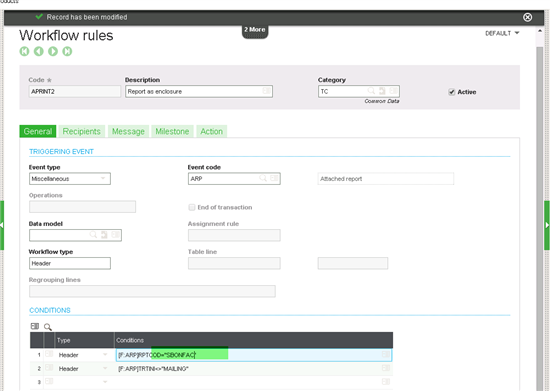
  7. Open Setup, Workflow, Workflow rules.
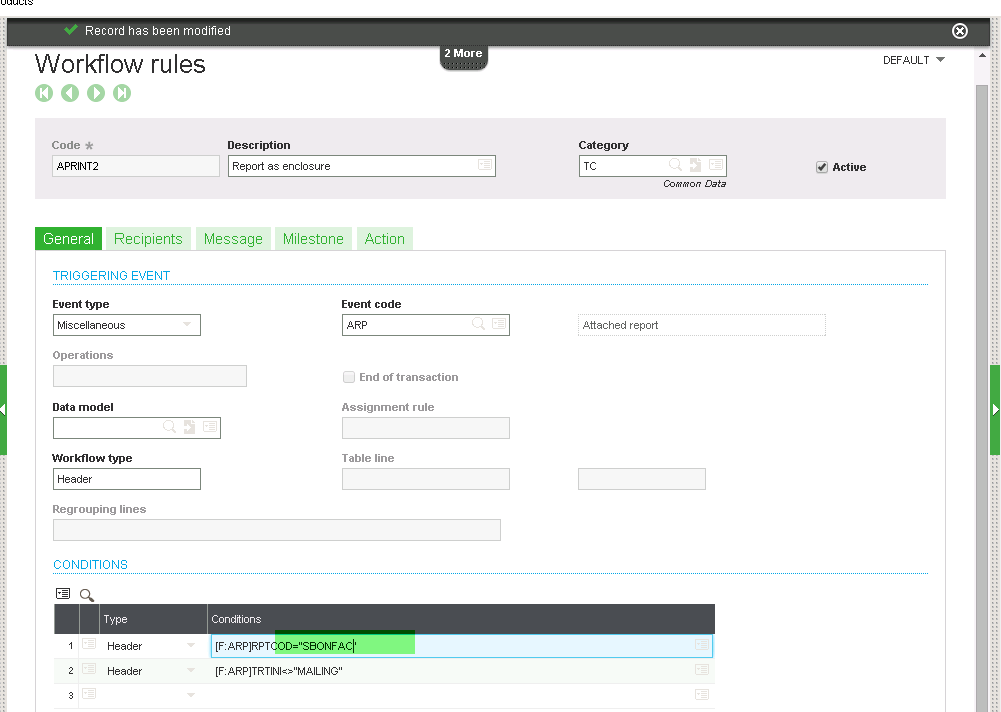
  8. Select APRINT workflow and create a new workflow called APRINT2 , by coping APRINT.
  9. Set the condition on the workflow to only run when your Sales order invoice report is printing(in this example it's SBONFAC)


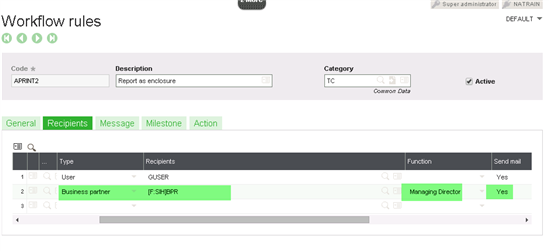
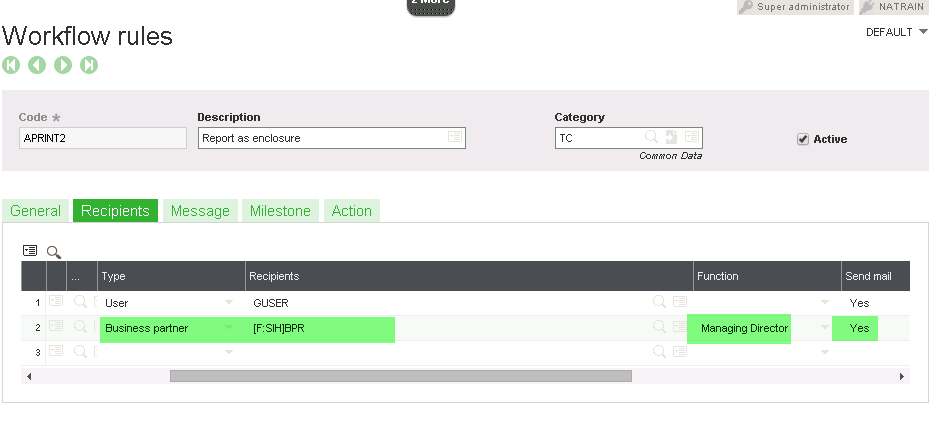
  10. Click on Recipients tab and add Business partner to the recipients, similar to below,( note this will email to the contact of the Bussiness parter who is the managing director).


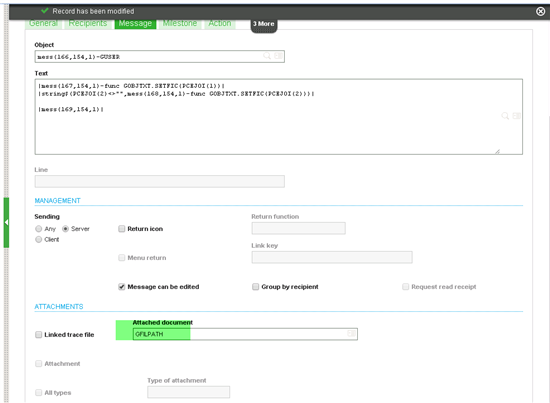
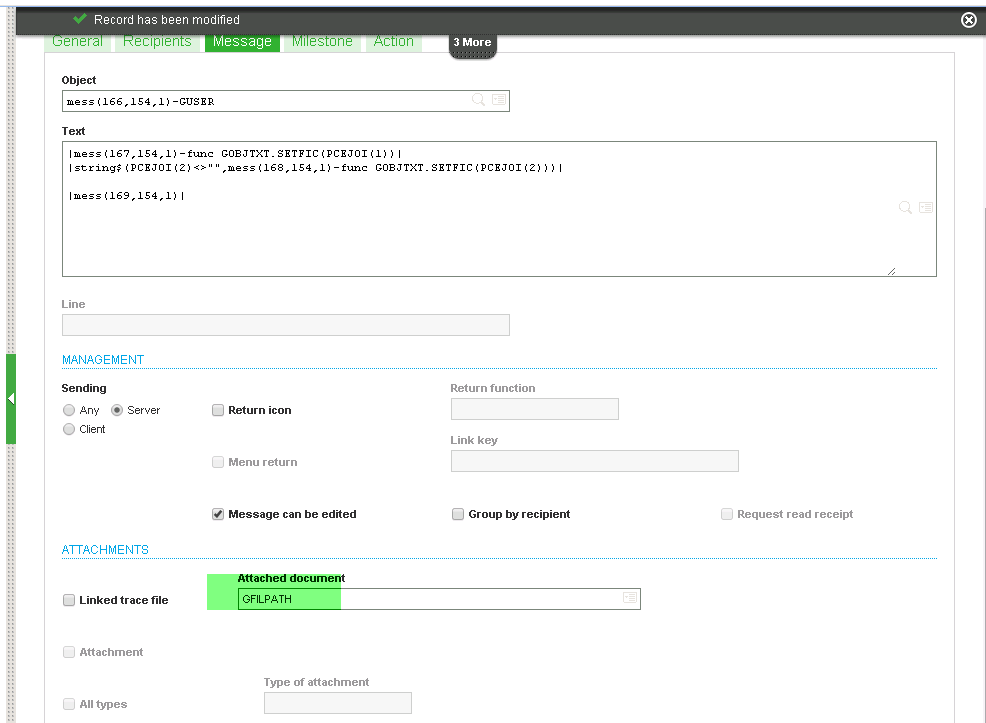
  11. On the Message tab, verify that GFILPATH is set under attached documents.


  12. Save and Validate.
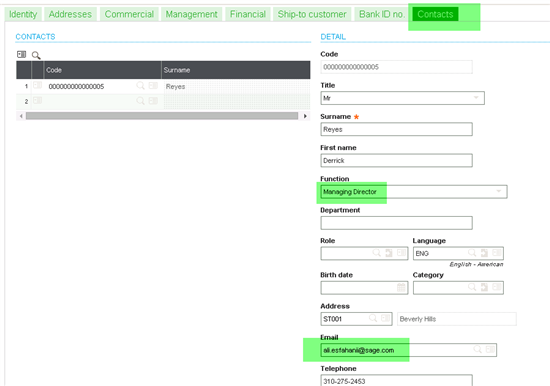
  13. Open Common Data, Customers, Customers.
  14. Select the customer you like to email.
  15. Click on Contacts tab and select the contact you like the email to go to and set them to the same function as the workflow function( in this example managing director).


  16. Open Sales, Invoices, Invoices.
  17. Create a new invoice for the customer above.
  18. Click Print to print the invoice.
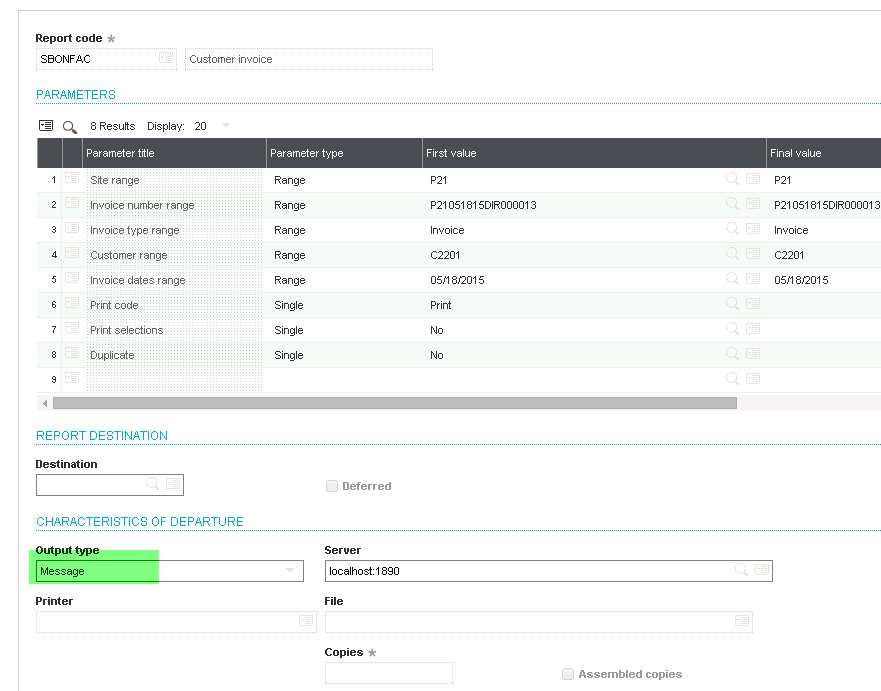
  19. Select SBONFAC report( this is the report we set as part of the workflow)
  20. Choose output of Message.
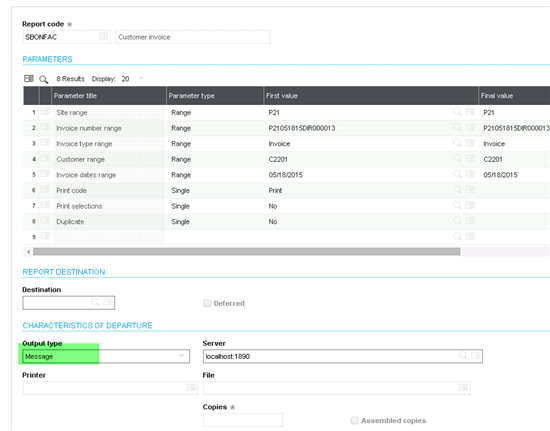


  21. Click Print.
  22. Your customer would receive an email with the attached invoice.

Conclusion: You can use the power of workflows to email a single document to a customer.

Entradas populares de este blog

SAGE X3 SILENT IMPORT (IMPORTSIL) WITH ERROR CATCHING

FUENTE ORIGINAL: https://pluginx3.com/en/blog/post/sage-x3-silent-import-importsil-with-error-catching.html You already know how to manually generate a CSV file in order to import it threw a template in Sage X3. But If you wonder how to catch detailed errors after a silent import here is the solution. Sometimes you need to catch the incoming errors in order to alert the end-user regarding an issue. Closed period, wrong date etc …. Unfortunalty the standard Sage X3 silent import function doesn’t natively show the detailed errors during the import process. Call IMPORTSIL([M:IMP2]MODIMP,[M:IMP2]NOMIMP) From GIMPOBJ And the standard function ERR_IMPORT will only show the overall status of the importation and not the detailed errors. IMPORTSIL function is pushing all the log data into a tracefile in order to avoid any popup on end-user screen. So you have a log file available in order to search for errors in it. Sage X3 runtime is using the same principals standards as any shell for log...

Valores de fstat

Fstat fstat  is a numeric status that is returned upon execution of a database operation, a sequential file operation, or a lock instruction. Syntax fstat Examples # MYTABLE is a table with a key called KEY1, that has a unique component called KEYVAL # Create a record in the table MYTABLE with they key value 1 if it doesn't exist Local File MYTABLE [MYT] Read [MYT]KEY1=1 If fstat [MYT]KEYVAL=1 : Write [MYT] If fstat MSG="The key was created in the mean time" Else MSG="Key created" Endif Else MSG="Key already exists" Endif Details fstat  is always set to '0' if the operation is successfully completed, and has a non-null value if there is an error: In a sequential read ( Getseq  and  Rdseq ),  fstat  is set to '1' at the end of the file. On  Lock ,  fstat  is set to '1' if the lock could not be performed. For a database operation ( Read ,  Look ,  Readlock ,  For ,  Write ,  ...

How To Add a Custom Selector for the Screen Field

Fuente original del artículo:   https://www.rklesolutions.com/blog/how-to-add-a-custom-selector-for-the-screen-field January 5, 2022 By RKL Team Leave a Comment There may be times when you want to add a pop-up window to select a field for a screen. Sometimes this can be handled automatically if the field is a standard X3 object field (i.e. when selecting a product with a type of ITM from the ITMMASTER table). There may be other times where a standard look-up is not available, and some custom code is required to do the selection window. We'll show you how to add a custom selector of your choosing to the screen field. ADD SELECT ON SCREEN FIELD The first step is to add the appropriate code to the field on the screen in Sage X3: Go to  Development > Script Dictionary > Screens Select Your Screen Select the field to have the lookup for  by moving your cursor to it on the screen. The field should show with a blue background. Select a type of "Selection" , and an  ac...