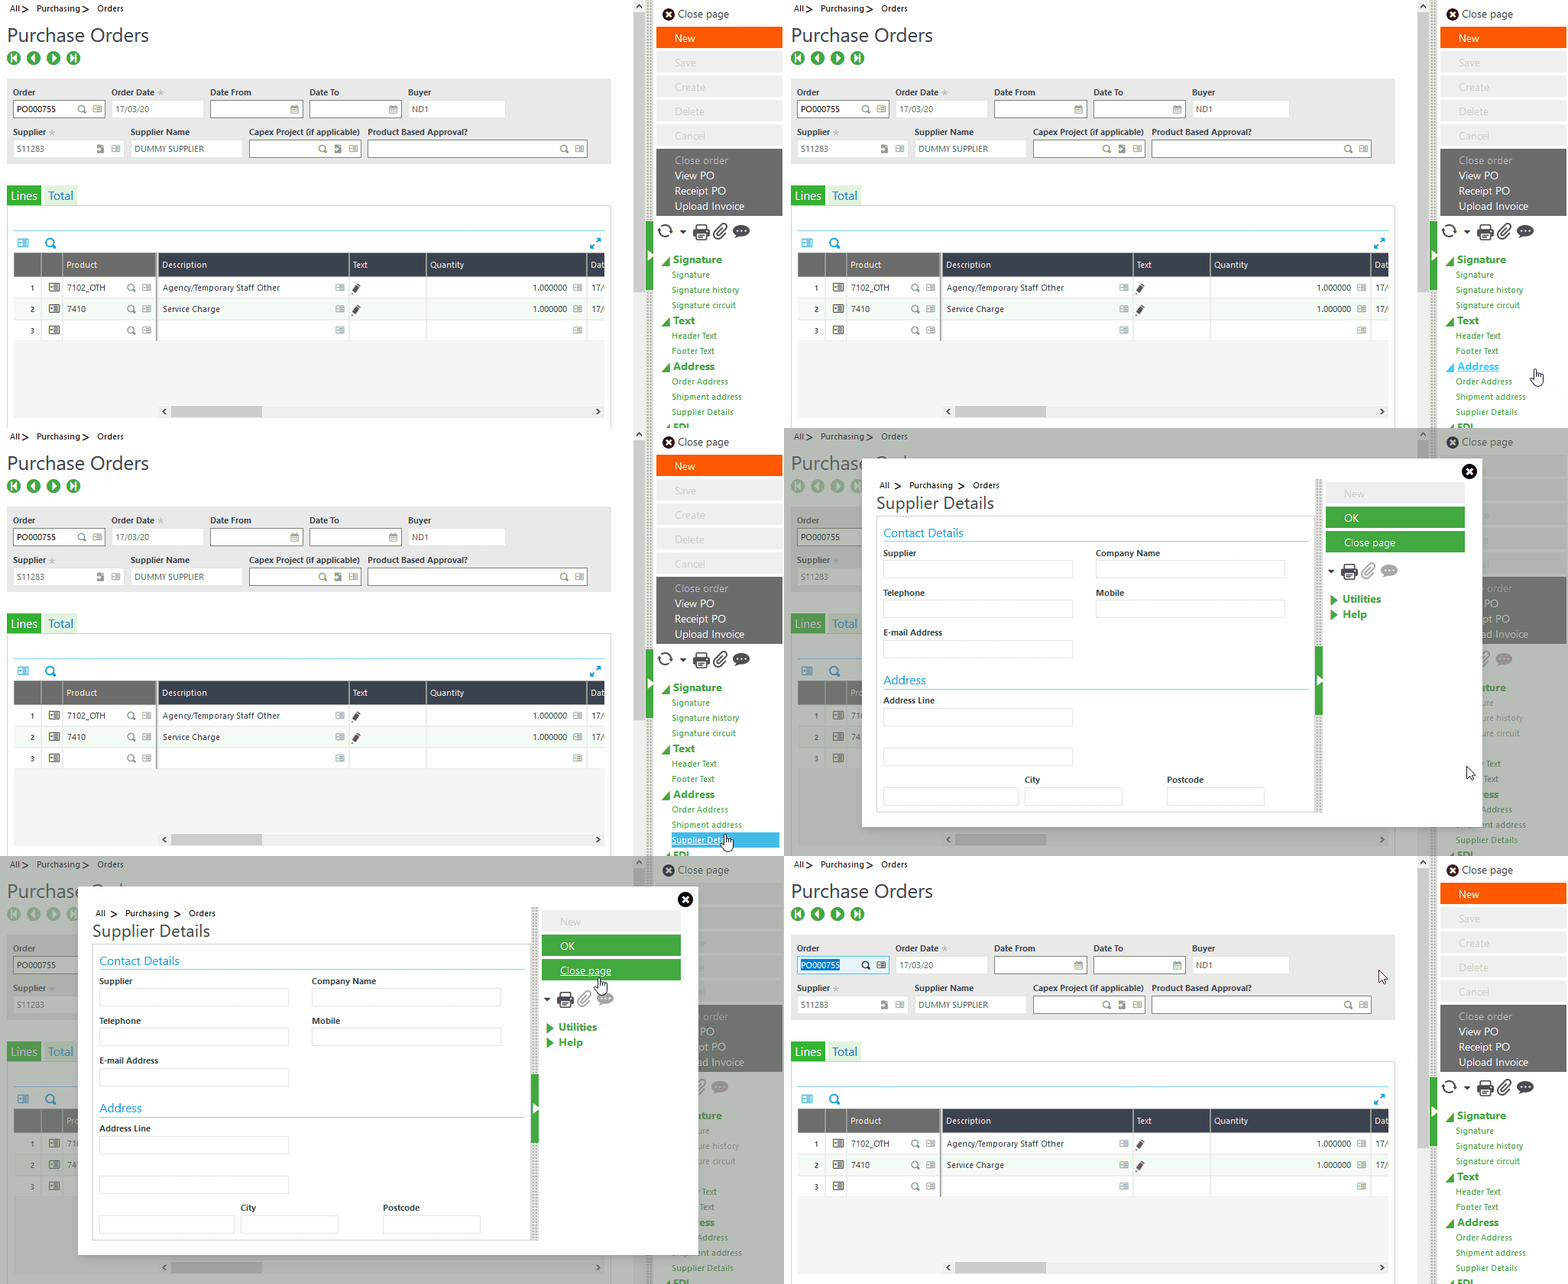
There are occasions in X3 where we need to launch a pop-up dialog box from a button and pass data from the source screen to the pop-up window. This can easily be accomplished with a combination of a screen, window and an action and a bit of code.
In this demonstration, I’ll set up a pop-up window to display information about a supplier that a purchase order has been raised for.
Creating the Screen
Firstly, we’ll need to create a new screen. This will be used to combine the fields we want to display in the window.
Navigate to Development -> Script Dictionary -> Screens

Set up a new screen with the screen code ZPOHBPS and the size set to Dialogue. Add the sections and fields necessary to be displayed in the window, such as supplier name, contact details and address fields. Save and validate.
Creating the Window
The above screen will be used within a new window, which will be shown to the user when they click on the button. Let’s create the new window.
Navigate to Development -> Script Dictionary -> Windows

Create a new window, setting the window type to Sundry/Miscellaneous and the display to Dialogue box. Under the Tabs section, add the screen that was created above and keep the rest of the values the same. Save and validate.
Creating the Action
The action we create will be responsible for passing the data from the source screen to the window through parameters, and also run the code we write to populate the fields.
Navigate to Development -> Script Dictionary -> Actions

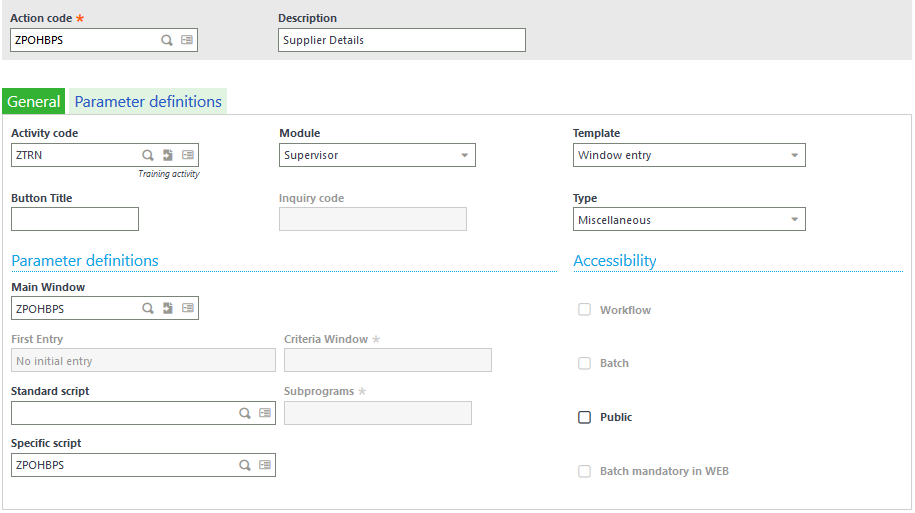
Set the template to Window entry and the type to Miscellaneous. Tab down to the Main Window field and type ZPOHBPS to set it to the window we created. Add a specific script called ZPOHBPS.
Under parameter definitions, add a new parameter for BPSNUM. These will be the parameters we pass to the action directly from the source screen.

Creating the Button
To allow this window to pop up on the purchase orders screen, we need to add a button to the window.
Navigate to Development -> Script Dictionary -> Windows

Search for OPOH in the left browser to find the window associated with the purchase orders screen. Under Buttons/menus, add a new button or menu item.

The button should link to the action created above. When this button is clicked, the action will be called and the window will show, running any code we write in the action specific script. We need to pass the value to the BPSNUM parameter by setting it under the parameter definition block.

Activating the Button
By default, buttons added under the ‘menu’ type are greyed out. To activate this button, we need to go to the specific script for the purchase orders screen and register it.
Navigate to Development -> Script Dictionary -> Script Editor
Open the SPEPOH script by typing the script name under the File name field. Add the following code under the $SETBOUT action to register the new menu item.
$ACTION
Case ACTION
 When "SETBOUT" : Gosub SETBOUT
 When Default
Endcase
Return$SETBOUT
 CHMEN += "r" # Add button code to CHMEN variable
Return
Compile the script, then validate the entry transaction under Parameters -> Purchasing -> Orders. You should now be able to click on the button and see a pop-up window appear with the fields from the screen.

Populating the Fields
All that is left to do is populate the new fields on the window. This is easily done by writing a snippet of code in the action created earlier.
Navigate to Development -> Script Dictionary -> Script Editor
Open the ZPOHBPS script by typing the script name under the File name field. Add the following code to the $DEBUT action. This will read from the tables, write the values to the screen fields created earlier and refresh the fields to populate the data.
$ACTION
Case ACTION
  When "DEBUT" : Gosub DEBUT
  When Default
Endcase
Return

$DEBUT

  # Read from the tables to fetch data
  If !clalev([F:BPS]) : Local File BPSUPPLIER [BPS] : Endif
  Read [BPS]BPS0 = PARAM(1)

  If !clalev([F:BPA]) : Local File BPADDRESS [BPA] : Endif
  Read [BPA]BPA0 = 1;PARAM(1);"AD1"

  # Write to screen fields
  [M:ZPOHBPS]BPSNUM = [BPS]BPSNUM
  [M:ZPOHBPS]BPSNAM = [BPS]BPSNAM
  [M:ZPOHBPS]TELNUM = [BPA]TEL(0)
  [M:ZPOHBPS]MOBNUM = [BPA]TEL(4)
  [M:ZPOHBPS]EMAIL  = [BPA]WEB(0)
  [M:ZPOHBPS]ADDLIG(0) = [BPA]BPAADDLIG(0)
  [M:ZPOHBPS]ADDLIG(1) = [BPA]BPAADDLIG(1)
  [M:ZPOHBPS]ADDLIG(2) = [BPA]BPAADDLIG(2)
  [M:ZPOHBPS]CTY = [BPA]CTY
  [M:ZPOHBPS]POSCOD = [BPA]POSCOD

  # Refresh screen fields
  Affzo [M:ZPOHBPS]
Return
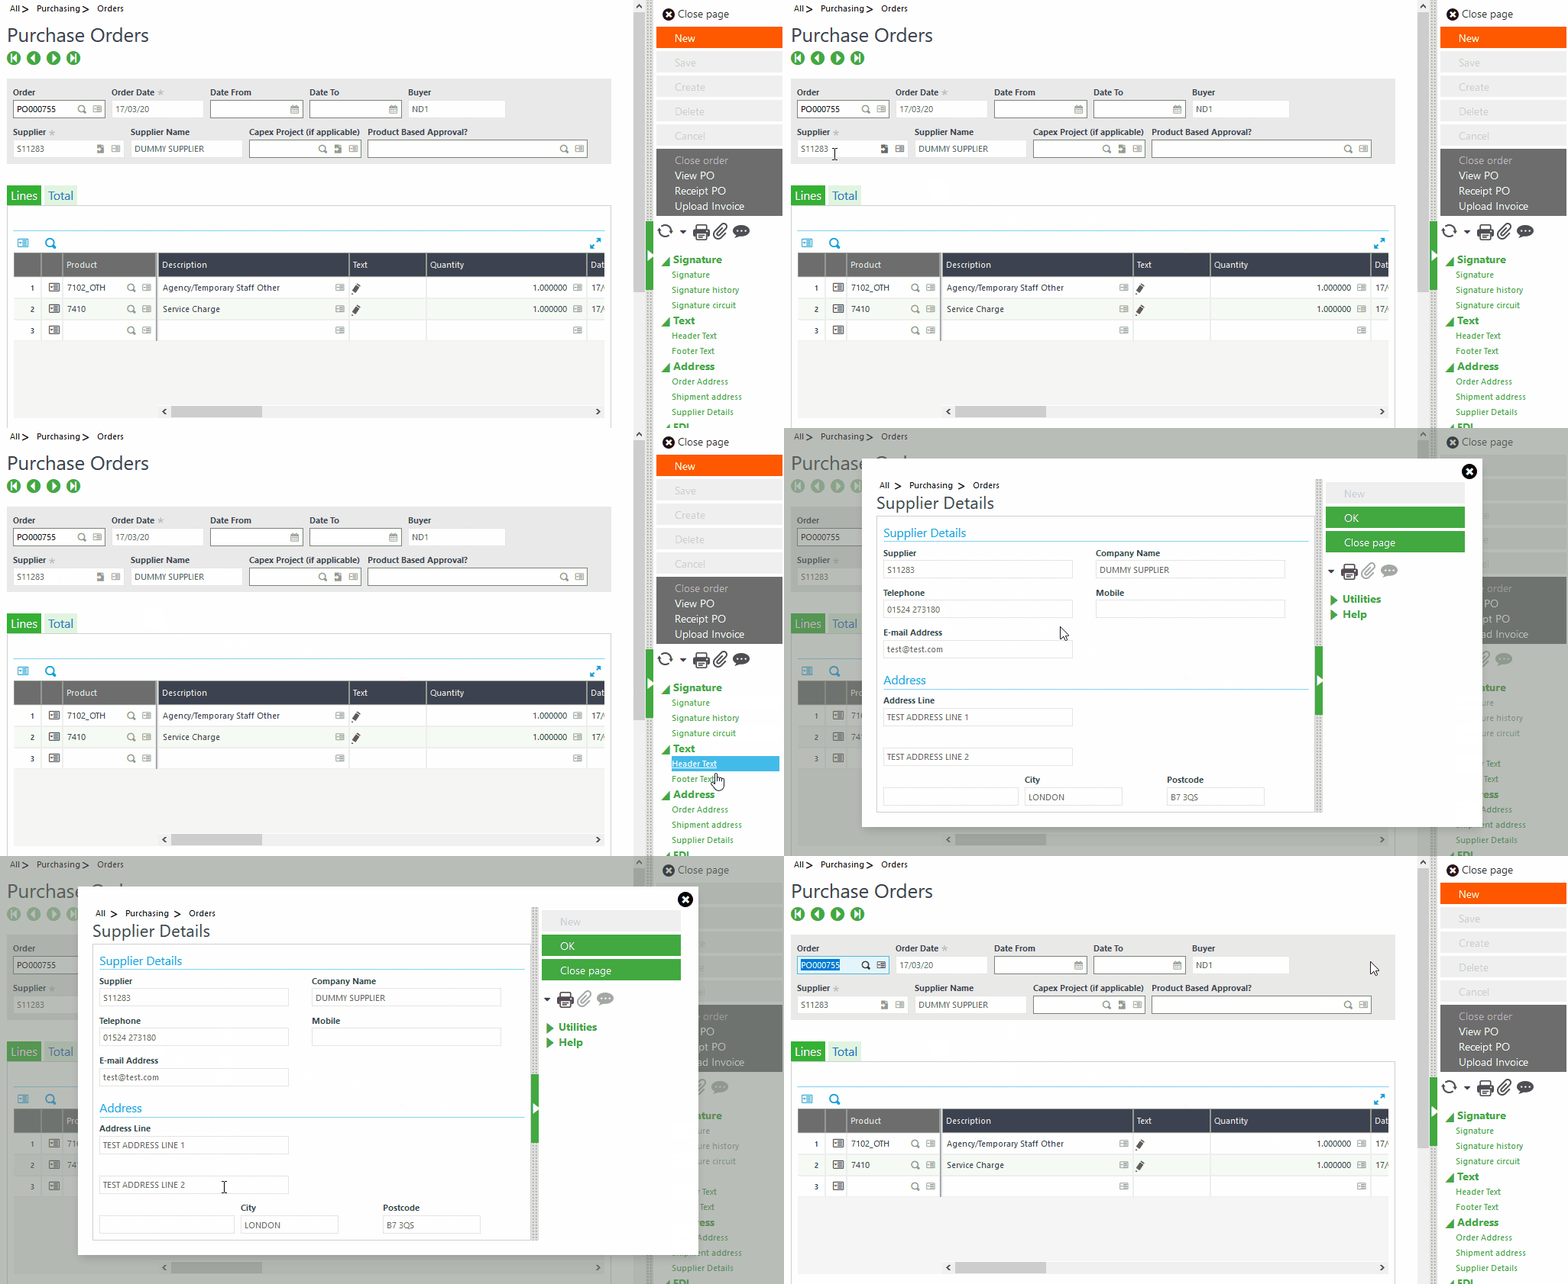
The final view should look something like this…


