fuente original:
https://pluginx3.com/en/blog/post/how-to-use-eclipse-debug-and-sage-x3-.html
The recent trend with cloud has several side effects, on Sage X3 debugger tools.
Many Sage X3 consultants encounter several issues in order to connect their Eclipse and Sage X3 in debug mode.
These issues are sometimes linked to network complexity, if you are fed up with “infbox” in the code here is the context and the workaround.
Before:
Eclipse and Sage X3 were in the same network and both software were able to communicate together easily.
Same network, same router less restrictions regarding traffic

Nowadays:
With cloud computing, you have two different networks connected with a VPN and a lot of security that does not allow you to reach the debug port. Two network, two firewall, two routers and different traffic rules on each side.

1) Solve Sage X3 and Eclipse network issues
Make sure firewall on both sides has rules that allows communication threw TCP port 10000 or the port you have choosen for debugger. Check also what IP/Network you are supposed to use on your computer in order to reach and communicate with the Sage X3 server. You can easily test the communication part with the following command: Telnet [IP] [port] [IP] = Sage X3 Server [Port] = Port you want to use (usually 10000)

If it works you will have a blank black screen otherwise an error message.
2) Sage X3 debug setup (Static IP only)
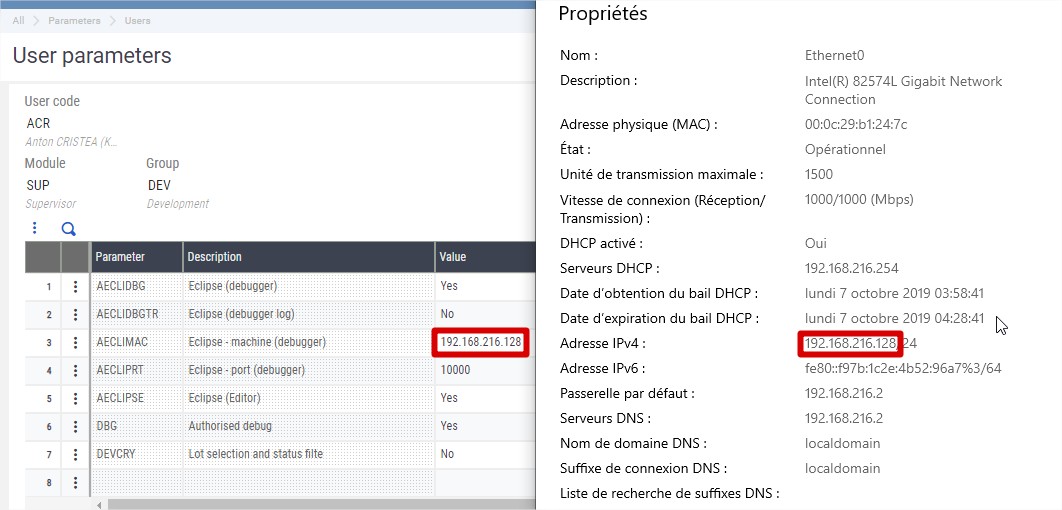
You can setup the debugger parameters directly in Sage X3 if your IP is static in order to automate the configuration. If your IP is dynamic it’s not necessary to configure the Sage X3 side, because it will change every time and you will have to reconfigure Eclipse anyway. This is only for people with reserved or static IP address. This configuration can be made at different level in Sage X3 solution: - Folder - Legislation - User We advise you to make this setup on User level in order to avoid disfunction for you colleagues, that might be on different network as you. Parameters > Users > Users (GESAUS) > [LOGIN] > Parameter definitions > Module Supervisor > Group DEV You need to enter in Sage X3 the IP of your computer (the one able to communicate with Sage X3 server). Usually this IP is the one delivered by the VPN, that allow you to connect to Sage X3. If you have any doubt, please ask your system administrator to help you. In the example below my computer IP delivered by the VPN is 192.168.216.128

3) Eclipse configuration
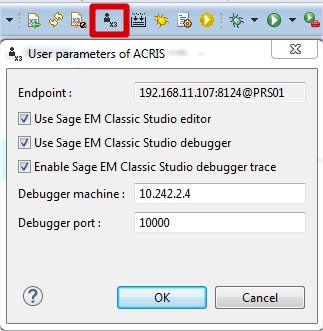
If your configuration is made correctly on Sage X3 parameter definitions side (optional), Eclipse will automatically download this information from Sage X3. You can check this part by clicking on this icon, this is the first proof of communication
between Sage and Eclipse

If configuration is not correct or blank and does not fit with your actual IP (most of the time dynamic) you can change this value manually directly in Eclipse. Modifying the parameters In Eclipse will not modify the parameters in Sage X3 debug configuration. The IP you set in Eclipse has to be the same one as the one attributed to your computer, remember that your personal VPN IP can change so make sure every time you reconnect your setup does tally in eclipse.
4) Bind Eclipse with Sage X3
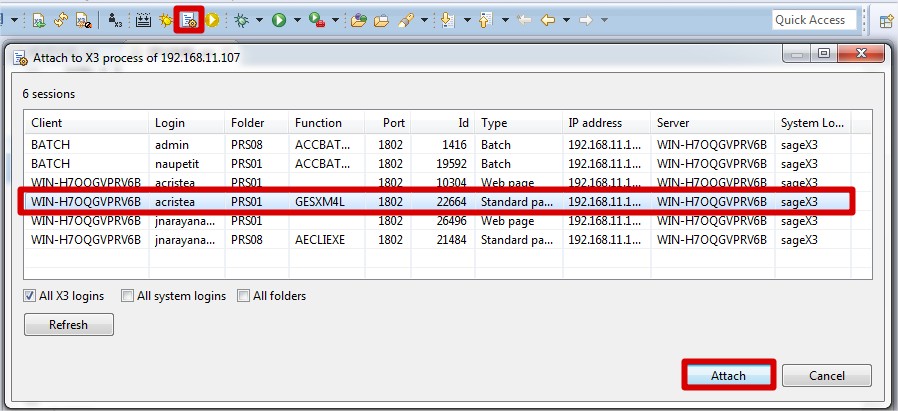
You might have several Sage X3 open session and only 1 debug port is available so you have to bind them. You need to manually indicate to Eclipse witch specific web session to use for testing and debugging. Press the Eclipse session icon in order to select the Sage X3 web session on the list and then click on attach button

5) Sage X3 debug mode threw Eclipse
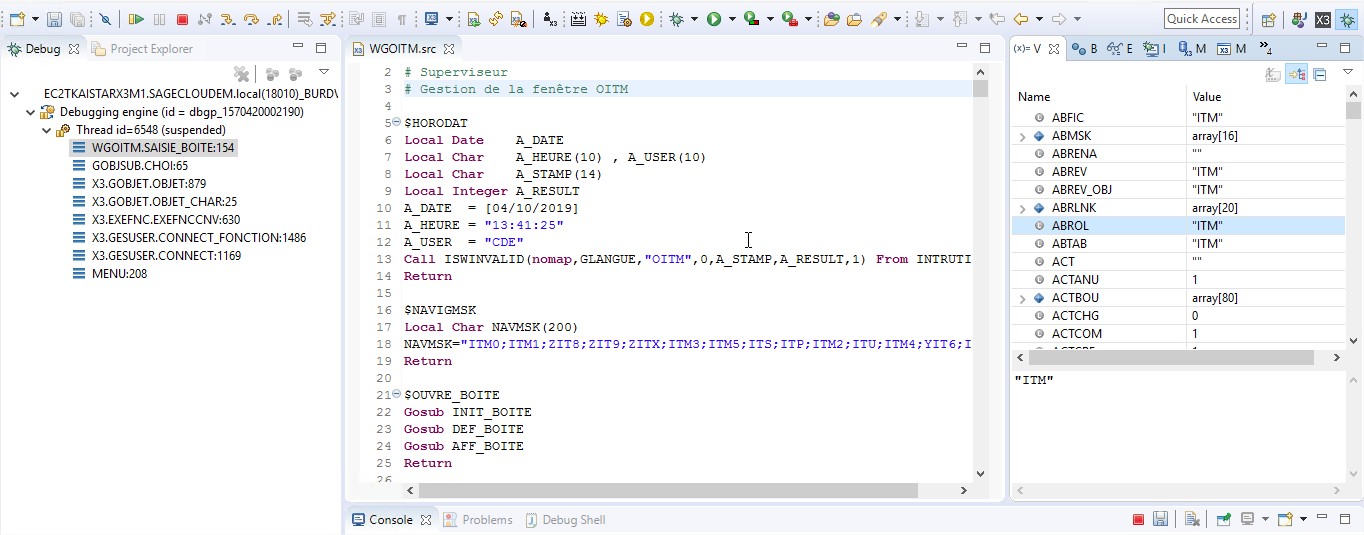
Navigate on Sage X3 selected web session and Eclipse will automatically open the debug perspective You will have to switch between actions in Sage X3 and Eclipse in order to go forward in your debug Example: Set a breakpoint in SUBAUS program in Eclipse. Go to GESAUS function with your Sage X3 web session, What will happen? Sage X3 will halt (because of the breakpoint) until you press continue in Eclipse Eclipse will automatically switch to the debug perspective with the information related to your breakpoint
