Ir al contenido principal

Accessing Sage ERP X3 using RF (Radio Frequency) Devices / VT220 Terminals


Fuente original: Greytrix

https://www.greytrix.com/blogs/sagex3/2012/03/31/accessing-sage-erp-x3-using-rf-radio-frequency-devices-vt220-terminals/
By  | March 31, 2012

Sage ERP X3 provides the ability to create stock transactions and production follow-up through Radio Frequency Terminals (RFT). RFT Devices connect to Sage ERP X3 using Terminal Server.

Check ProductSage Enterprise Management Development Services

Pre-requisites for accessing Sage ERP X3 using RF Devices

  • Activate the Activity Code “ADC”
  • Install Apache HTTP Server.
  • Install Safe X3 Web Server.
  • Configure Safe X3 Web Server using Sage X3 Console.

Validating/Testing the Terminal Server Connection

After successful installation of Safe X3 Web Server, start the Web Administration tool.

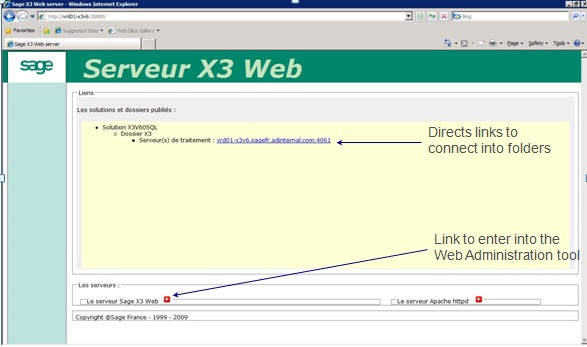
In the Web Administration tool, go to the Terminal Server Tab and click on Configuration. This will list the Port and Host information for Terminal Server.

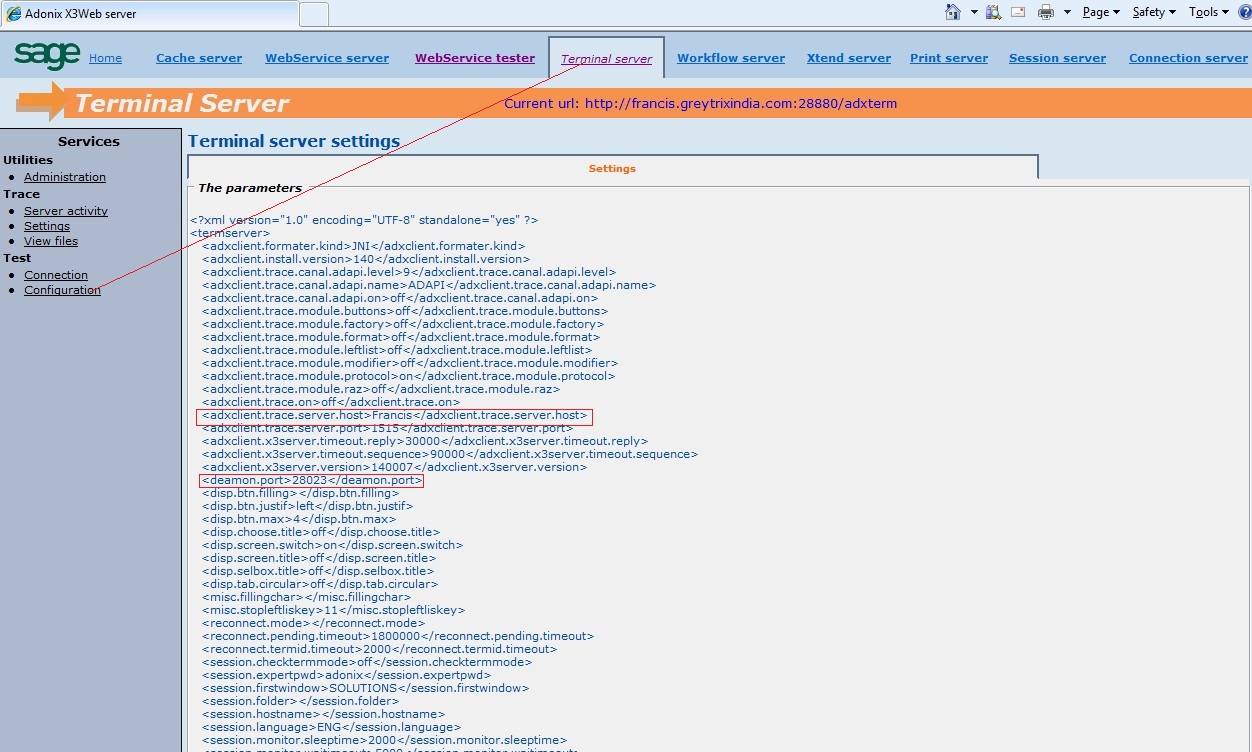
In the Web Administration tool, go to the Terminal Server Tab and click on Connection. If everything is perfect you will be able to see the below screen that lists all folders.
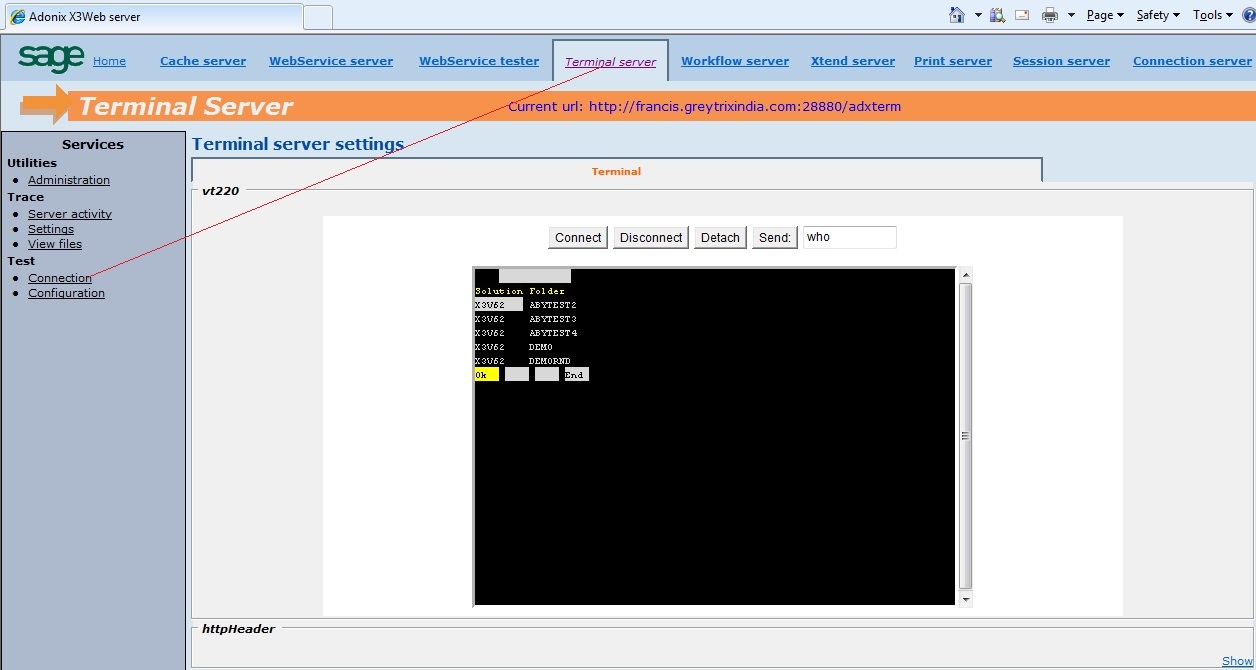
If you need to change the Port for Terminal server you can do the same using Safe X3 Console.

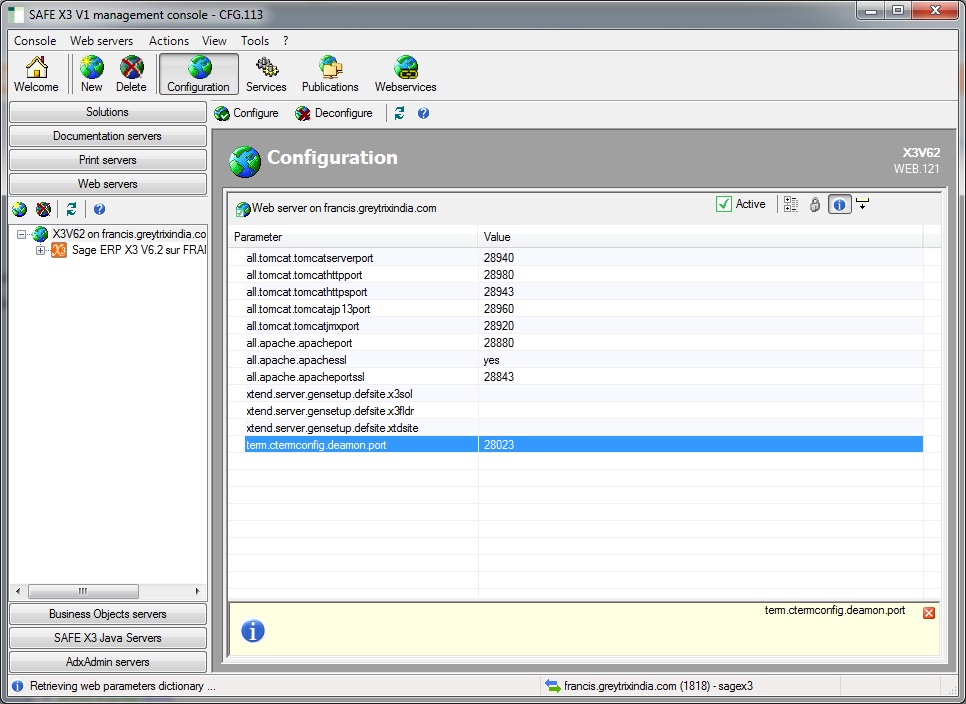
You can also test your connection using Telnet Protocol. You can start a telnet session by running the following command: “telnet servername port” i.e. “telnet francis.greytrixindia.com 28023”. This will give you the list of folders and you can connect further.

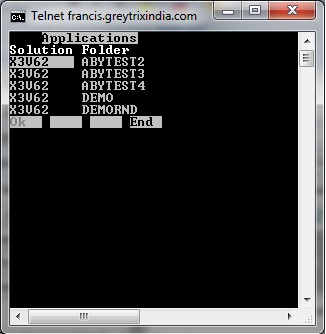
Finally, a great advantage of Telnet is to test any changes made to the ADC screens or if you are adding new screens to be accessed via RF Terminals. It suppresses the need of VT220 emulator for testing customizations. Said that, there are emulators as well that can be used for testing customizations.

Entradas populares de este blog

Valores de fstat

Fstat fstat  is a numeric status that is returned upon execution of a database operation, a sequential file operation, or a lock instruction. Syntax fstat Examples # MYTABLE is a table with a key called KEY1, that has a unique component called KEYVAL # Create a record in the table MYTABLE with they key value 1 if it doesn't exist Local File MYTABLE [MYT] Read [MYT]KEY1=1 If fstat [MYT]KEYVAL=1 : Write [MYT] If fstat MSG="The key was created in the mean time" Else MSG="Key created" Endif Else MSG="Key already exists" Endif Details fstat  is always set to '0' if the operation is successfully completed, and has a non-null value if there is an error: In a sequential read ( Getseq  and  Rdseq ),  fstat  is set to '1' at the end of the file. On  Lock ,  fstat  is set to '1' if the lock could not be performed. For a database operation ( Read ,  Look ,  Readlock ,  For ,  Write ,  Delete ,  R

3 ways to send a mail from code in Sage X3, with more attachments too

Origen Fuente:  https://en.sagedev.it/sagex3/send-mail-from-code-with-attachments-sage-x3/ Autor:  https://en.sagedev.it/category/sagex3/ In this post I’ll show you how to send a mail from adonix code in Sage X3. The points we will face are: 1) Meladx/Send introduction 2) Sending  through  meladx (the best way for me: at the end with just a single code line you send a mail!) 3) Sending  through  Workflow 4) Sending  through  ENVOI_MAIL(…) From AWRKMEL Sending mail from code in Sage X3: Send vs meladx Sage X3 has two native ways for sending mails. The first way is  meladx  executable file, that you can find in  runtime\bin  directory. The seconde one is Send instruction, that was used to send mail through an application of the client station (for more information on “Send GSERMES”  go here ). The Meladx executable Meladx send messages through SMTP/POP3 protocols by means of the mail  server  specified in the command. When sending is launched by a work

How to upload a file from the client?

You may have a need to upload a file to the server, and in the past you may have used COPSRV routine from ORDSYS. On V6 the limit that this routine had was that, you did not know the file name of the file that is getting transferred to the server, and you had to define the file name for the destination.  But things have changed on newer version. Before we get to the example review online help title "How to manage files in the storage area"  As you noted in the online help, in the new version COPSRV will copy the file to server TMP directory. So in below example I am going to use another routine MOVE from ORDSYS to move the file to my desired location. In this example, I am adding a button to Sales order, for transferring the file. Open  Development, Script dictionary, Windows. Select  OSOH  window. Add a new button.  Save  and  Validate. Open  Setup, Sales, Entry transactions, Orders. Validate  the entry transaction. Now open  Development, Scr