Many Sage X3 objects can be exposed as a web service. Below are the steps on how to do this.
1. Log on to the Safe X3 Client
2. Go to Web Services
Development > Script dictionary > Scripts > Web Services
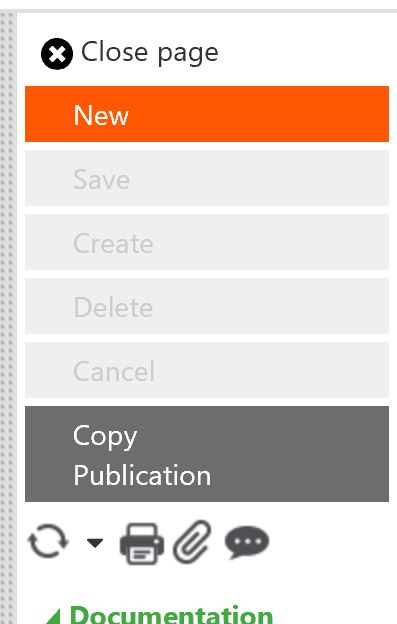
- Click "New" on the right navigation bar.
- Enter the Publication name.
- Enter a description
- Select "Object"
- Enter the Object Name
- If the object has more than one transaction associated with it, you will be required to select the transaction to publish.

- Click "Create", "Save", then "Publication".
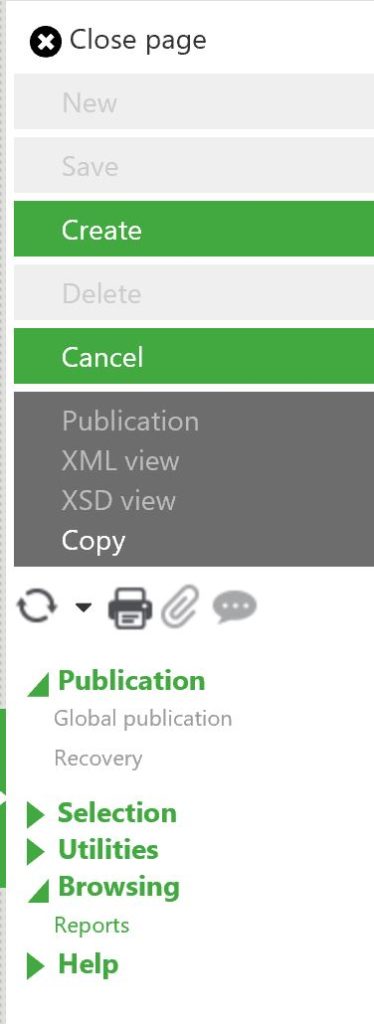
- After the web service is published, the Publication date will be updated.

CREATING CUSTOM SUBPROGRAMS TO CALL AS WEB SERVICE
Custom subprograms can also be created and be called as a web service. The example below retrieves a list of customers that were added or updated within the past n days.
Create the Subprogram
When working with Update 7 and later, Eclipse must be used to create and editor scripts.
1. From Eclipse, go to File / New / Safe X3 Source File.
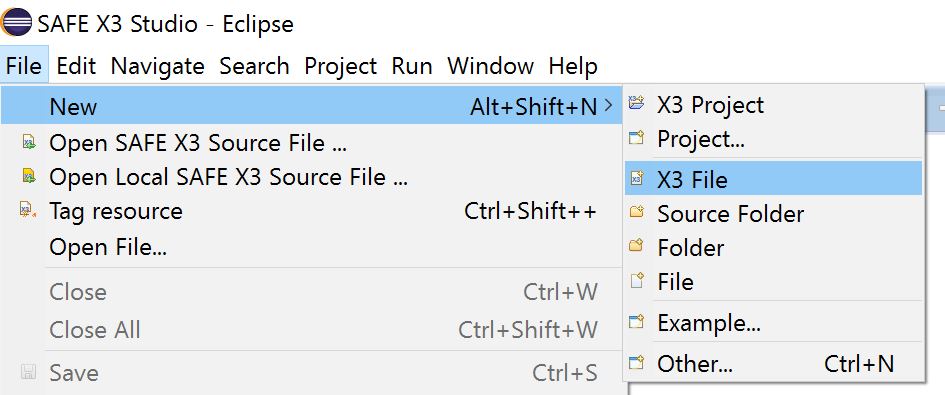
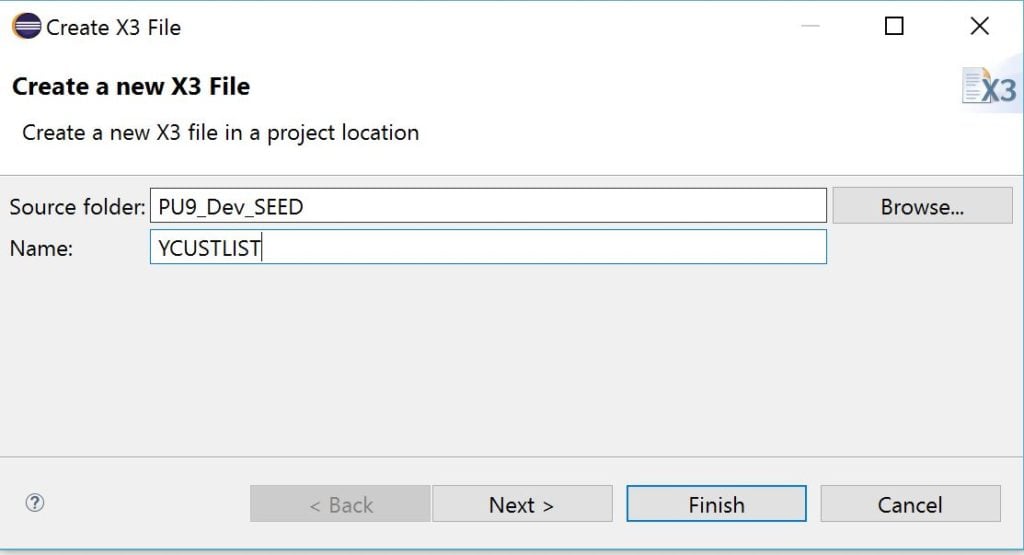
2. Select the Source folder and enter the File Name. The source folder will be the folder name that was set up and configured in Eclipse. This points to a Sage X3 installation and endpoint.
3. A blank window will appear to enter X3 code.
4. Enter the code below. Any parameters that are input variables must be defined with the "Value" keyword. Any parameters that are returned must be defined with the "Variable" keyword. In the example below, UPDDAYS and CUSTID are passed in as parameters, and BPCNUM, BPCNAM, UPDDAT, BPCINV, BPDADD, FCY and CUSGRP are returned.
################################################################
# Program Name: ZCUSTLIST
# Description: Subprogram to Web Service for Customer Listing
# Called by Web Service ZWSCUSTLIS
################################################################
# *Revision Log*
#---------------------------------------------------------------
# Rev Date User Description
#---------------------------------------------------------------
# 000 10/10/2013 D. Hartman Created
################################################################
Subprog CUSTLIST(UPDDAYS, CUSTID, BPCNUM, BPCNAM, UPDDAT, BPCINV,
BPDADD, FCY, CUSGRP)
# Pass number of days since last update
# Returns any customers updated within the last (n) days
Value Integer UPDDAYS
Value Char CUSTID
# Returns any customers updated within the last (n) days
Value Integer UPDDAYS
Value Char CUSTID
# Returns array of:
# BPCNUM - Customer Number
# BPCNAM - Customer Name
# UPDDAT - Last Update Date
# BPCINV - Bill to ID
# BPDADD - Default Ship to ID
# FCY - Facility Code
# CUSGRP - Customer Group
Variable Char BPCNUM () ()
Variable Char BPCNAM () ()
Variable Date UPDDAT ()
Variable Char BPCINV () ()
Variable Char BPDADD () ()
Variable Char FCY () ()
Variable Char CUSGRP () ()
# Calculate cutoff date using current date and update days
Date UPDDATE : UPDDATE = date$-UPDDAYS
Date UPDDATE : UPDDATE = date$-UPDDAYS
# Read from Customer Table
Local File BPCUSTOMER [BPC]
Local File BPARTNER [BPR]
Local File BPCUSTOMER [BPC]
Local File BPARTNER [BPR]
# The Web Service is set up to return up to 2000 records. If this is
# reached, break out of loop to avoid error in index.
Local Integer LISTMAX : LISTMAX = 2000
# reached, break out of loop to avoid error in index.
Local Integer LISTMAX : LISTMAX = 2000
# Fill arrays with Customer Data
Local Integer I : I = 0
Local Integer I : I = 0
Link [BPC] With [BPR]BPR0=[F:BPC]BPCNUM
& As [LNK]
& Where ([F:BPC]UPDDAT >= UPDDATE or [F:BPC]BPCNUM = CUSTID) and [F:BPC]BPCSTA = 2 and [F:BPC]BPCTYP = 1 and [F:BPC]OSTCTL <> 3
& As [LNK]
& Where ([F:BPC]UPDDAT >= UPDDATE or [F:BPC]BPCNUM = CUSTID) and [F:BPC]BPCSTA = 2 and [F:BPC]BPCTYP = 1 and [F:BPC]OSTCTL <> 3
For [LNK]
BPCNUM(I) = [BPC]BPCNUM
BPCNAM(I) = [BPC]BPCNAM
UPDDAT(I) = [BPC]UPDDAT
BPCINV(I) = [BPC]BPCINV
BPDADD(I) = [BPC]BPDADD
FCY(I) = [BPR]FCY
CUSGRP(I) = [BPC]BPCGRU
I += 1
If I >= LISTMAX : Break : Endif
Next
End
BPCNUM(I) = [BPC]BPCNUM
BPCNAM(I) = [BPC]BPCNAM
UPDDAT(I) = [BPC]UPDDAT
BPCINV(I) = [BPC]BPCINV
BPDADD(I) = [BPC]BPDADD
FCY(I) = [BPR]FCY
CUSGRP(I) = [BPC]BPCGRU
I += 1
If I >= LISTMAX : Break : Endif
Next
End
$INITWS
# Used for testing the web service
#UPDDAYS= 700
Return
# Used for testing the web service
#UPDDAYS= 700
Return
$RESULTWS
Return
Return
5. Click F7 to compile and save the code. If the code compiles successfully, "Compilation finished without error" will appear at the bottom left section of the page.
Save the Sub-Program
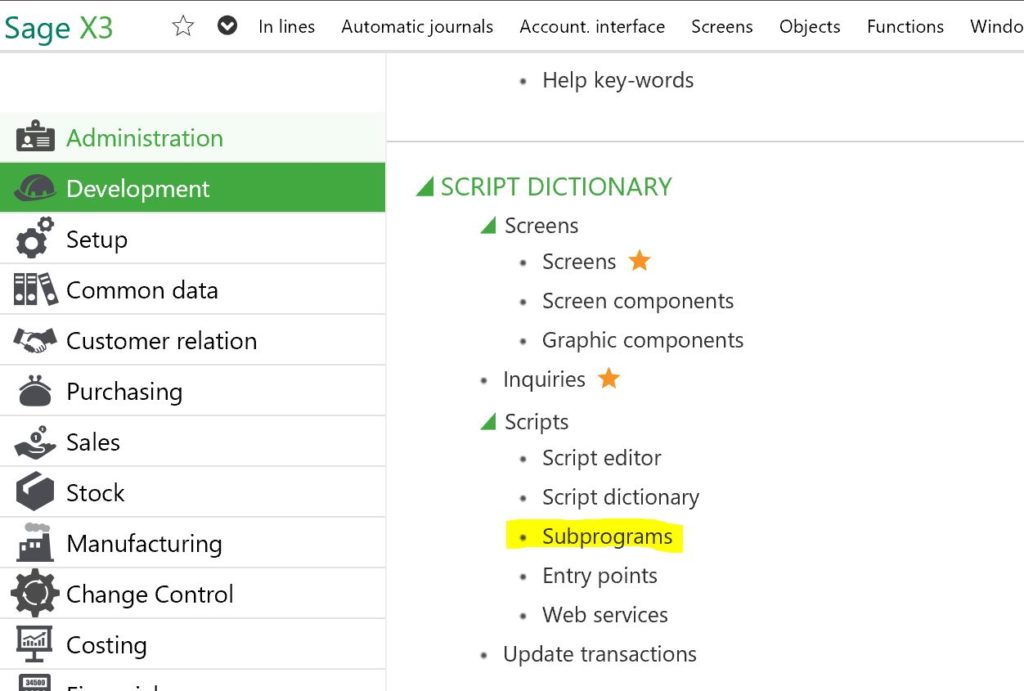
- Return to Sage X3.
- Go to Development > Script dictionary > Scripts > Subprograms
3. Click the "New" link in the right side ribbon.
4. Enter the information as below. "File" should match the file name above, and "Subprograms" should match the name of the subprogram within the file.
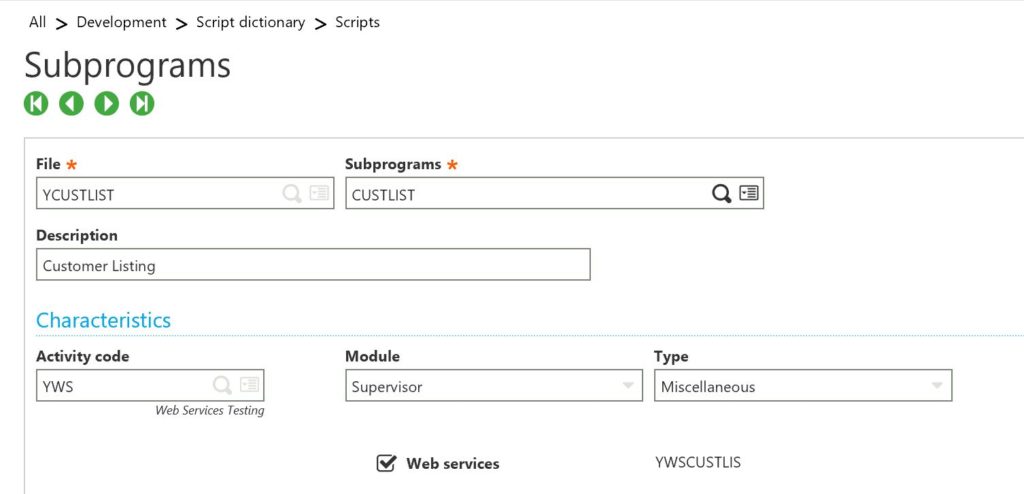
5. Assign an Activity Code, Module and Type.
6. Make sure the "Web services" checkbox is checked.
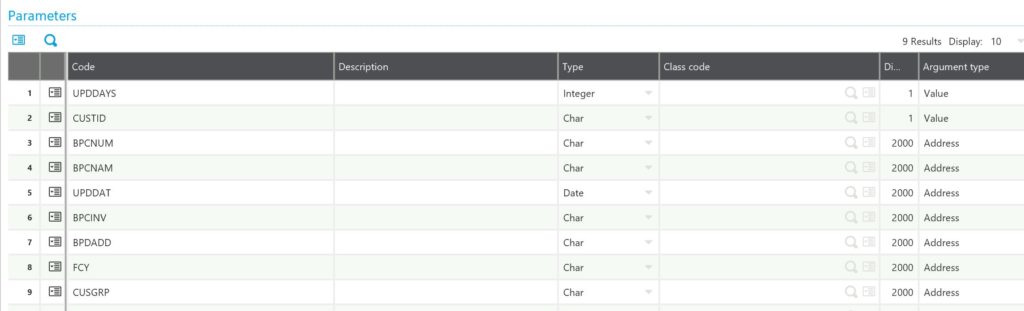
7. By default, it will set the dimensions on all returned variables to 1. In the code example above, it returns up to 2000 results. Change the "Dim" for each returned variable to 2000.
8. Click "Create", then "Save".
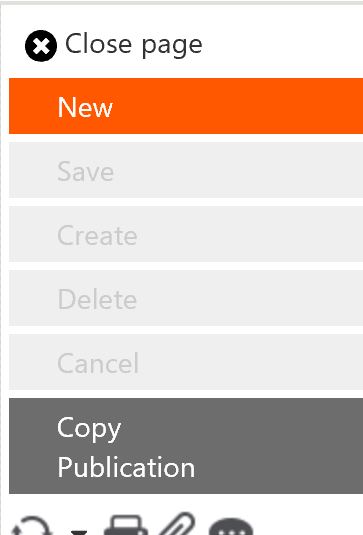
9. Click the "Publication" link in the right ribbon to create the web service.
10. The Web services screen will appear. Enter the publication name. In this example, the name is "YWSCUSTLIS". Since this was generated from the "ZCUSTLIST" processing and "CUSTLIST" Subprogram, these values are automatically populated in the "Service" section.
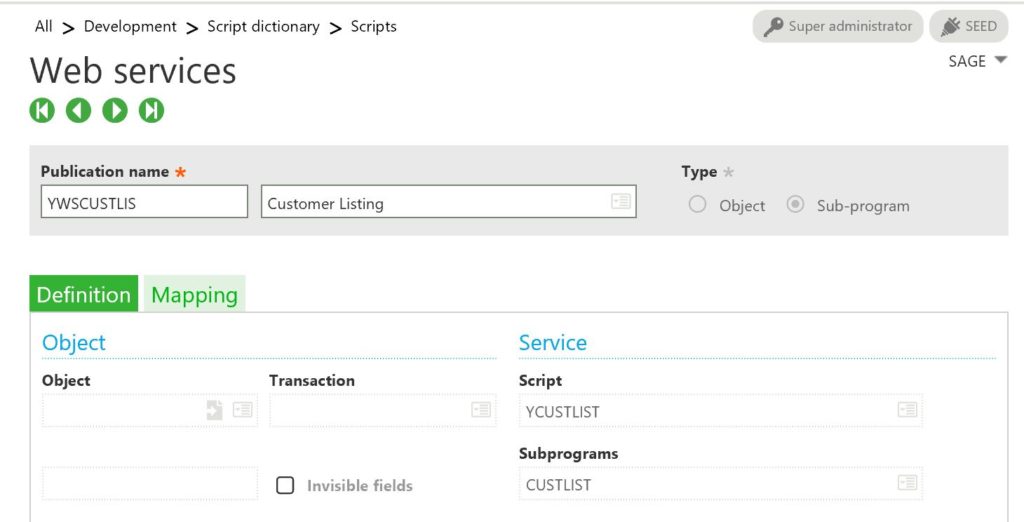
- Click "Publication" to create the web service.