CREATE THE CALL CONTEXT
CALL THE WEB SERVICE
The example below is based on calling a Sage ERP X3 Web Service that was generated from a custom sub-program. Refer to the post Day 2 – Creating X3 Web Services for instructions on creating a custom sub-program and exposing it as a web service. The code sample below displays the .net code used to call the web service.
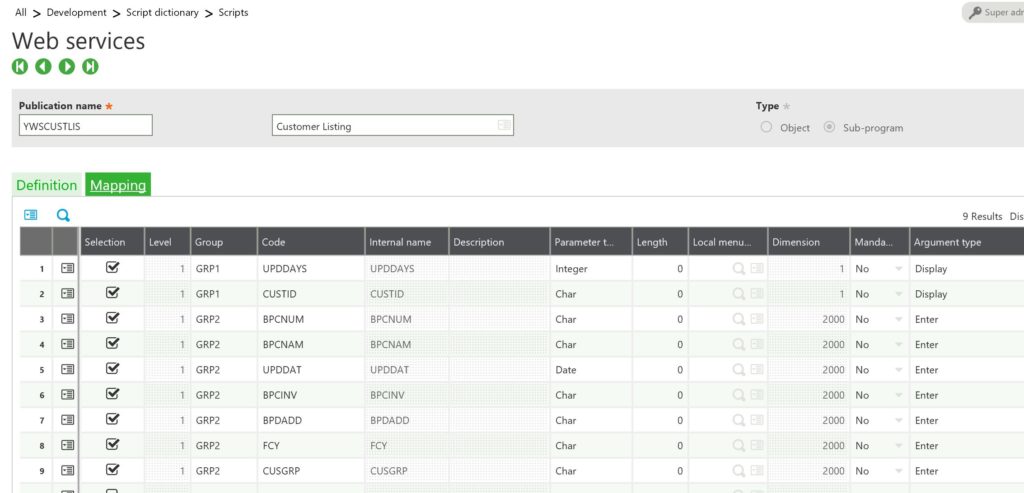
- The first step will be to construct the XML parameter list to make the web service call. This will vary based on the parameters defined in the custom web service. The example below is based on web service ZWSCUSTLIS. As shown below, the parameters passed into the web service are UPDDAYS and CUSTID. The results will include an array of up to 2000 customers.
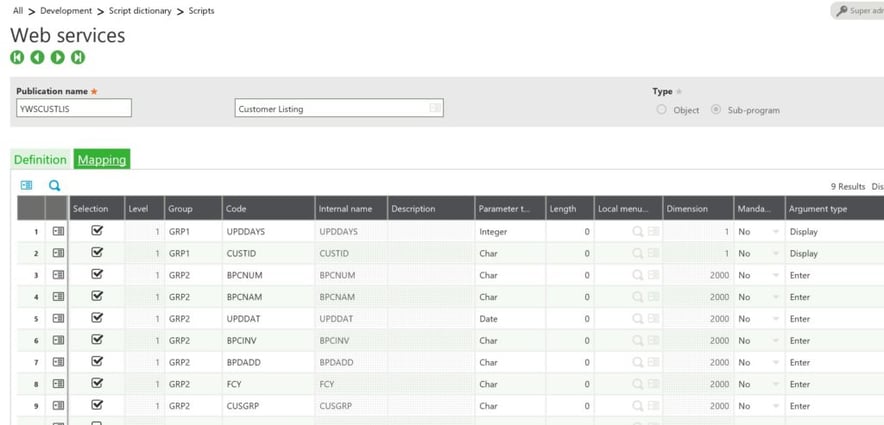
- The XML Parameter string will be constructed as shown below, to match the required parameters for the subprogram call.
<PARAM>
<FLD NAME="UPDDAYS" >30</FLD>
<FLD NAME="CUSTID" > </FLD>
</PARAM>
- Call the Web Service
Below is a snippet of the .net code required to call the web service. The web service will return an xml string containing the call results. This string can be parsed to extract the details of the call.
public
List<X3_Account_List> GetAccounts(int iUpdateDays, string sAcctId){ List<X3_Account_List> lsAccts = new
List<X3_Account_List>();
// Initialize Connection Values
X3DataAccessConn.CallContextClass oCallContext = _connDetails.GetCallContext();
// Complete call context
oCallContext.CallContext.requestConfig ="adxwss.trace.on=off&adxwss.trace.size=16384&adonix.trace.on=off&adonix.trace.level=3&adonix.trace.size=8";
// Complete call context
oCallContext.CallContext.requestConfig ="adxwss.trace.on=off&adxwss.trace.size=16384&adonix.trace.on=off&adonix.trace.level=3&adonix.trace.size=8";
// Build Input XML with Parameters
StringBuilder xmlInput = new
StringBuilder(""); xmlInput.Append("<PARAM>");xmlInput.AppendFormat("<FLD NAME="{0}">{1}</FLD>", "UPDDAYS", iUpdateDays.ToString());xmlInput.AppendFormat("<FLD NAME="{0}">{1}</FLD>", "CUSTID", sAcctId);xmlInput.Append("</PARAM>");
// Call web service
oCallContext.ResultXML = oCallContext.WebService.run(oCallContext.CallContext, "ZWSCUSTLIS", xmlInput.ToString()); string result = ""; foreach (X3WebService.CAdxMessage msg in oCallContext.ResultXML.messages){result += msg.message.ToString() + "^";}
// Success
if (result.Length == 0){ string xml = oCallContext.ResultXML.resultXml.ToString(); lsAccts = ExtractAccts(xml);}
return lsAccts;} public
CallContextClass GetCallContext(){ // Initialize connection values
CAdxCallContext callContext = new
CAdxCallContext(); CAdxWebServiceXmlCCService webService = new
CAdxWebServiceXmlCCService(); CAdxParamKeyValue[] paramKey = new
CAdxParamKeyValue[1]; CAdxResultXml resultXML = new
CAdxResultXml();callContext.codeLang = _x3Language; // Connection language
callContext.codeUser = _x3User; // X3 user
callContext.password = _x3Pwd; // X3 password
callContext.poolAlias = _x3WSPool; // Connection pool name
CallContextClass context = new
CallContextClass(callContext, webService, paramKey, resultXML);return context;}