When consuming X3 web services from another platform, such as .net, an X3 user and password must be used to make the web services call. If the admin user in X3 is set up to call web services, the password by default is blank. This means the user in the X3 web service call is admin, and the password is blank. This may cause several issues or concerns as far as security goes. First of all, you may want to use a user other than the admin user to make the web services calls. Second, you will likely want to use a password other than blank.
If you have created a new user in X3, and defined it as a web services user, and attempt to use that newly created user and password combination to call the web service, you will likely find that the call fails. The reason is, the web service is making the call at the folder level, and the user/password defined when the user was created is not the user/password combination the web services layer is using to validate the user.
Creating the User
Here are the steps to create a new user to use in the consumption of web services in X3.
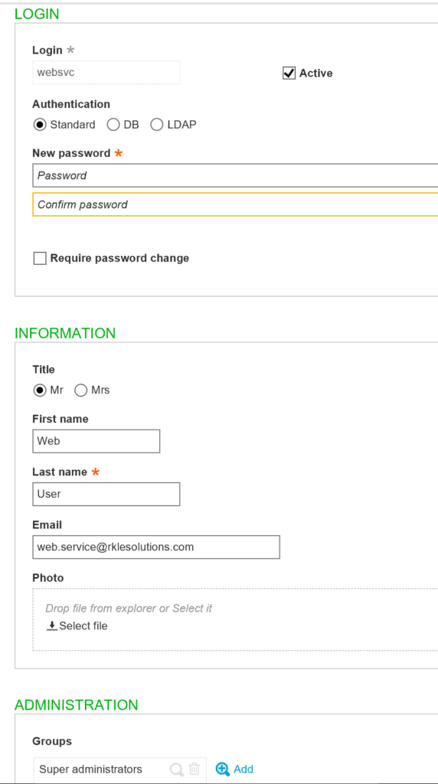
- Create a user as you normally would in X3. This is done from Administration > Users

- In my example, I created a user named websvc with a password of websvc.
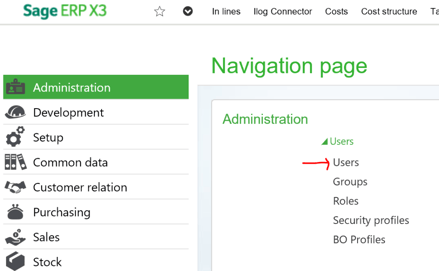
- Next, go to Setup > Users, and create the user as an X3 user.
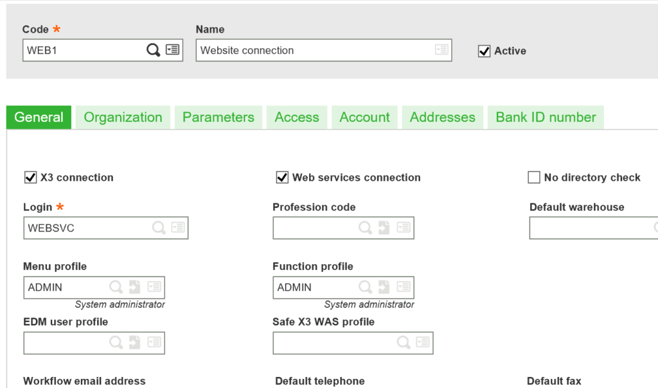
- In my example, I created an X3 user of WEB1, and attached it to the WEBSVC login. Remember that the checkbox next to “Web services connection” needs to be check to enable this user as a web services user.
Consuming the Web Service from an External Application
At first thought, you may think you can now access the web services from a .net program using this same user and password that is used to log into X3. However, if you try to consume the X3 web services using the user websvc / websvc, the authentication will fail. The web services call will return a message indicating the password is incorrect.

If you change the password in your web services call to blank, the web service will successfully connect, however, you probably don’t want to use a blank password.
Resolution
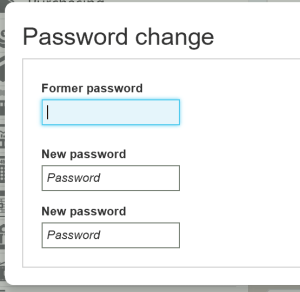
- Return to the X3 session, making sure you are logged in as your web services user (websvc in my example).
- Go to Usage > Password Change.

- You will be asked to enter the “Former password”, along with a new password. By default, when a user is created, the “Former password” will be blank. Leave the “Former password” blank, and enter a new value for the “New Password”. In my case, I made the new password “password”. Changing this password will not affect the password that is used to log into X3.
 4. Now return to the .net program, and use the newly entered value from above for your password, which in my case, was “password”. The web service authentication will now work.
Summary
When attempting to consume X3 web services from an external application, you will want to provide a secure method of accessing X3. This will likely require creating a user used exclusively for web services, and providing a secure password to use to consume those web services. The information above provides detailed steps on how to successfully create a user with a secure password to consume the web services.