Ir al contenido principal

Setting Up Web Services


Web services can be useful in providing real-time interfaces between any ERP System and an external 3rd party or custom application. Sage ERP X3 Web Services can be used to expose custom or existing Sage ERP X3 objects and functions as web services.
This is the first in a series of 5 posts which will step through examples of creating and consuming web services for Sage ERP X3. Here's a summary of the other 4 posts in this series if you'd like to jump to another topic:
Now on to our current topic Setting Up Web Services ...

Setting up Web Services in Sage X3

The first step in using web services in Sage X3 is to enable web services.
  • Log on to the Safe X3 Console as the administrator.
    Safe X3 Console
  • The following screen will appear.
    Sage X3 V1 management console screen
  • Select "Web servers" from the left panel, then click "Webservices" at the top. ***
    Sage X3 V1 management console screen
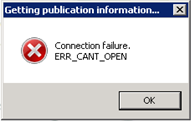
    *** If the following error appears, make the sure ADXADMIN service has been started.
Sage X3 ConnectionFailure
  • Expand the folder to be published, click on the server name, and click "Add".
  • Make sure the new node is selected, and populate the connection parameters. To maintain a parameter value, double-click the parameter. A parameter prompt box will appear.
    Sage X3 Web Services Enter Parameter Screen
  • Populate the parameters as shown below:
    • pool.def.alias – This is the alias for the web services. I normally set this to the name of the X3 folder.
    • pool.def.userid – This is the X3 admin user id.
    • pool.def.password – This is the password for the above X3 user id.
    • pool.def.osuserid – This is the windows user id.
    • pool.def.ospassword – This is the password for the above user id.
    • pool.def.maxsize and pool.def.initsize - By default, 2 licenses are available, so this could be set to 2. If web services are enabled on more than 1 folder, a license must be available for each one. By setting this to 1, web services can be enabled on another folder with the initial 2 licenses.
  • Click "Apply" to save the changes.

Entradas populares de este blog

Valores de fstat

Fstat fstat  is a numeric status that is returned upon execution of a database operation, a sequential file operation, or a lock instruction. Syntax fstat Examples # MYTABLE is a table with a key called KEY1, that has a unique component called KEYVAL # Create a record in the table MYTABLE with they key value 1 if it doesn't exist Local File MYTABLE [MYT] Read [MYT]KEY1=1 If fstat [MYT]KEYVAL=1 : Write [MYT] If fstat MSG="The key was created in the mean time" Else MSG="Key created" Endif Else MSG="Key already exists" Endif Details fstat  is always set to '0' if the operation is successfully completed, and has a non-null value if there is an error: In a sequential read ( Getseq  and  Rdseq ),  fstat  is set to '1' at the end of the file. On  Lock ,  fstat  is set to '1' if the lock could not be performed. For a database operation ( Read ,  Look ,  Readlock ,  For ,  Write ,  ...

SAGE X3 SILENT IMPORT (IMPORTSIL) WITH ERROR CATCHING

FUENTE ORIGINAL: https://pluginx3.com/en/blog/post/sage-x3-silent-import-importsil-with-error-catching.html You already know how to manually generate a CSV file in order to import it threw a template in Sage X3. But If you wonder how to catch detailed errors after a silent import here is the solution. Sometimes you need to catch the incoming errors in order to alert the end-user regarding an issue. Closed period, wrong date etc …. Unfortunalty the standard Sage X3 silent import function doesn’t natively show the detailed errors during the import process. Call IMPORTSIL([M:IMP2]MODIMP,[M:IMP2]NOMIMP) From GIMPOBJ And the standard function ERR_IMPORT will only show the overall status of the importation and not the detailed errors. IMPORTSIL function is pushing all the log data into a tracefile in order to avoid any popup on end-user screen. So you have a log file available in order to search for errors in it. Sage X3 runtime is using the same principals standards as any shell for log...

3 ways to send a mail from code in Sage X3, with more attachments too

Origen Fuente:  https://en.sagedev.it/sagex3/send-mail-from-code-with-attachments-sage-x3/ Autor:  https://en.sagedev.it/category/sagex3/ In this post I’ll show you how to send a mail from adonix code in Sage X3. The points we will face are: 1) Meladx/Send introduction 2) Sending  through  meladx (the best way for me: at the end with just a single code line you send a mail!) 3) Sending  through  Workflow 4) Sending  through  ENVOI_MAIL(…) From AWRKMEL Sending mail from code in Sage X3: Send vs meladx Sage X3 has two native ways for sending mails. The first way is  meladx  executable file, that you can find in  runtime\bin  directory. The seconde one is Send instruction, that was used to send mail through an application of the client station (for more information on “Send GSERMES”  go here ). The Meladx executable Meladx send messages through SMTP/POP3 protocols by means of the mail  ...