Well today I would like to elaborate on the Short-Cut Keys in Sage ERP X3. This might seem like it should not be that big of a topic but you have to remember that the same code base is used for what I call the thick-client (or rich client) user interface and the web interface. The application can run on Windows or Linux. So there are a few anomalies from what some standard Windows users might be used to.
This is not meant to replace SageU training or documentation. I just felt it necessary to provide you with a general understand of the definitions since I have referred to a few of these in prior blogs and I will be doing so in future blogs.
Well let's start from the top. This is one everyone should be comfortable with. I will use the Customers form to discuss this various short-keys since this was the form I mentioned in my previous blog. You can launch this form by going to Common Data -> BPs -> Customers.
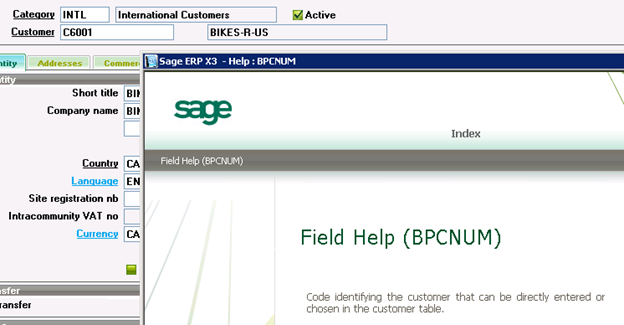
- F1 – Displays help for the Current field
Beware not every field, but almost every field will contain help. Some of the fields will be more useful than others. This shows the field name of the Customer field. This corresponds to the database field name.
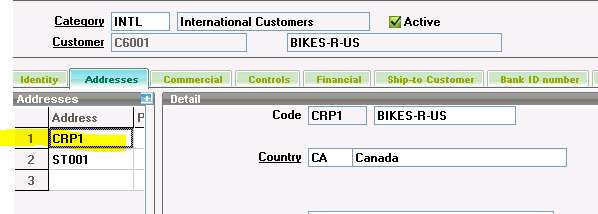
- F2 – Opens a field (you can also double-click the left mouse)
For example in the image below you can see that I am sitting on the Address CRP1 for Customer C6001. However until I press F2 or Double-click on the field I can't enter into that field.
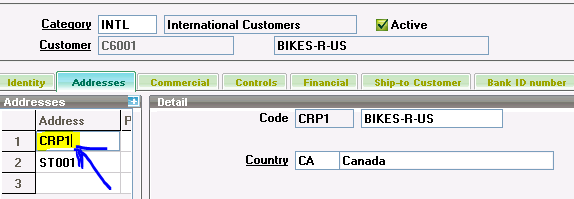
The same form below after pressing F2. You can see the cursor is now in the field.
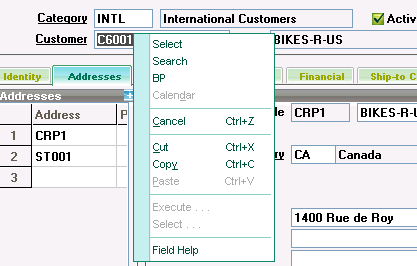
- F4 – Displays Pop-up Option Menu (you can also right mouse click)
The field that was selected below was the Customer. By pressing F4 or right mouse click you will be presented with a Context menu. You can further execute this menu with your keyboard as well by pressing the down arrow to scroll down the list. Once you get to the item you wish to execute you can press the enter key. You can also use your mouse to select one of the menu options.
- F5 – Used to Refresh a List or Window
Suppose you have filtered the search on the Left List as show below you can see a filter is on the Customer column. I have this filtered to just include Customer's that begin with 'C'. If you press F5 this will take the filter off and refresh the list with all customers.

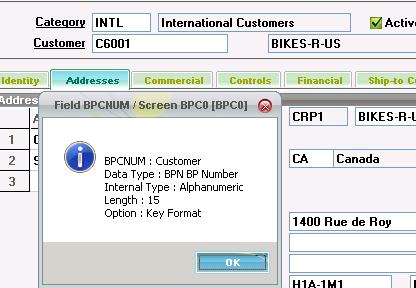
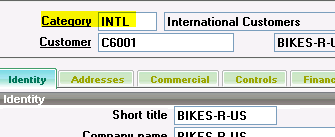
- F6 – Displays the Screen Name, Field Name as well as Data Type or Sizing Information in Respect to the Current Field
I pressed F6 while on the Customer field of the Customers window. You can see the Field name and Screen name in the Title bar of the window below. You can also see that Data Type and Length of the field.
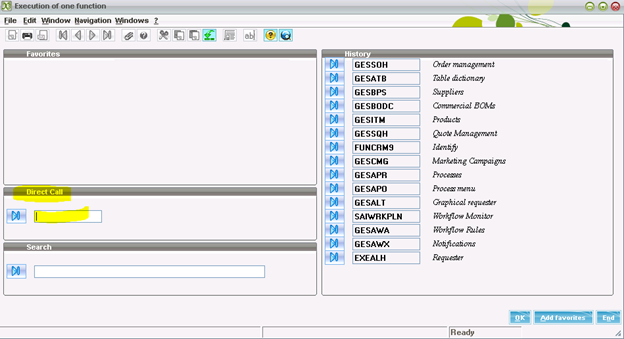
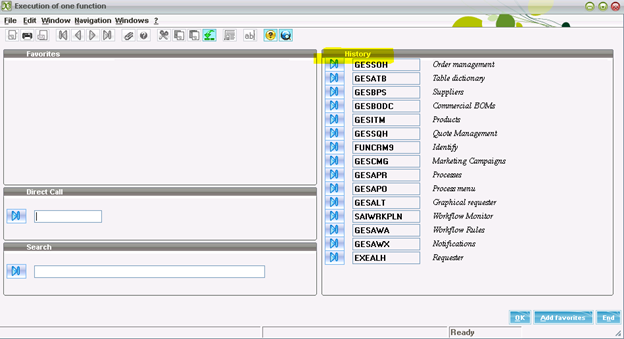
F7 – This Window has Multiple Purposes
- Allows you to Key-in or Lookup a Window or Screen and go directly to it by entering the function name and click the blue process button to the left of the field. You can also do an F5 or right click context menu lookup to select a function name.
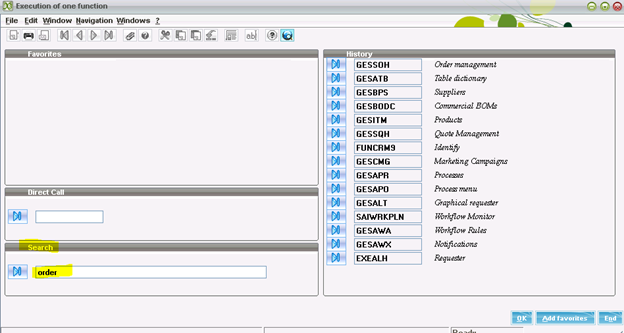
- Allows you to Key-in or Search for the Title (Name/Description) of a Window or Screen and go directly to it and click the blue process button to the left of the field. You can also just enter part of the name of the function description as I have below. You can click on the Ok or just press enter. It will return your results lists as shown in the second screen shot. You can just click the blue process arrow in the Access column to go directly to that function.
 It returned the results where it found Order in the Access path results from your Search criteria above.
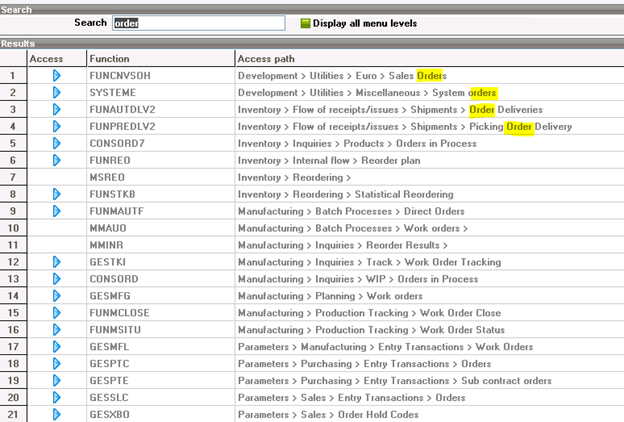
- Shows a History of Processes that were run by the Current User, this shows on the right of the window below, you can launch to that function by clicking the blue process arrow to the left of the window name.
- F8 – Display the Last Read List
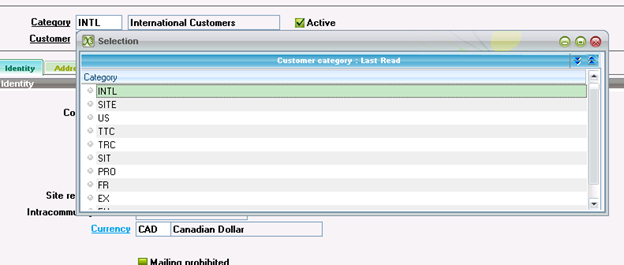
- F9 – Tunnels to the Entered Value's Setup Function
If I press F9 while on the Category field below it will take me to that Fields parent form
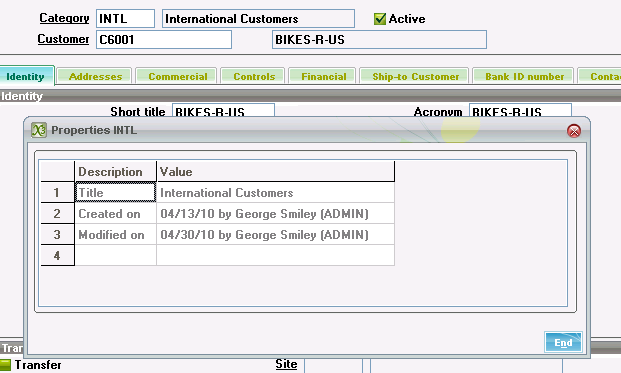
- F11 – Displays an Objects Properties
This will show the history behind the parent property of the object you are on.
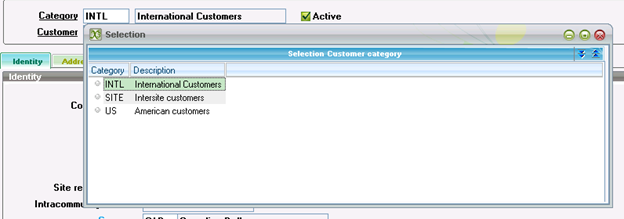
- F12 – Opens a Selection List for the Current Field
This is similar to using the F5 context menu above but only shows the select list for that field instead of all the other menu options.
- Shift+F1 – Displays Help for the Current Function (Task)
This is not available on every function and has limited data related to it.
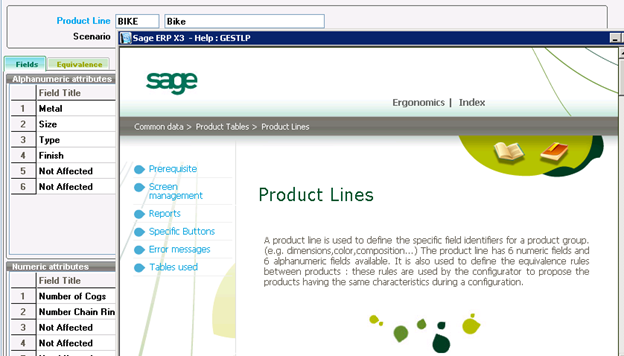
- Alt+F1 – Show Parameter Help
This shows the use of a parameter, level of localization, and it global variable association. This is not available on every function has limited data related to it.
I hope this makes your UI experience more valuable. In my opinion it is not quite as user-friendly or rich in feature set as it could be. I would like to see some short-cut keys for the page-frame tabs within the windows as well as short-cut keys for the action menu items such as Save, Create, Cancel, End, etc.