Ir al contenido principal

Testing Sage X3 SOAP Web Services in Update 9


Publishing the Web Services

The classic SOAP web services are created and published in the same way as prior versions, by publishing the object or subprogram as a web service.

INITIAL SETUP

A few steps must be taken to enable the SOAP Web Services. These options can all be found within the Administration section of X3.

Hosts Web Service Setup

From the Administration section, go to the Servers \ Hosts.
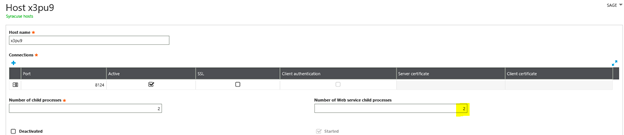
Confirm that the Number of Web Service Child Processes has a value.

SET UP THE WEB SERVICE POOL

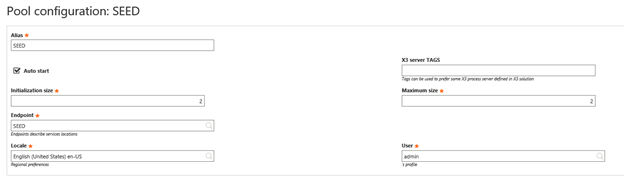
From the Administration section, go to Web Services \ Classic SOAP pools configuration.
Set up the Pool for the folder (endpoint) being used.
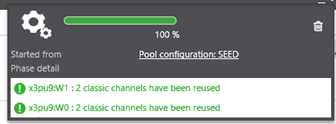
After the Web Service Pool is set up, click Start/Update.
Make sure the Start was successful.

Testing the Web Services

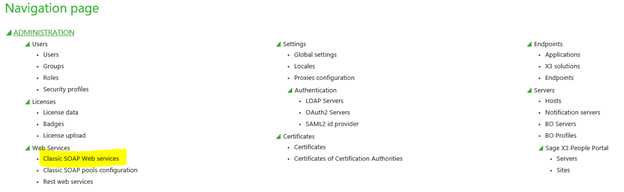
From the Administration section, go to Web Services \ Classic SOAP Web services.
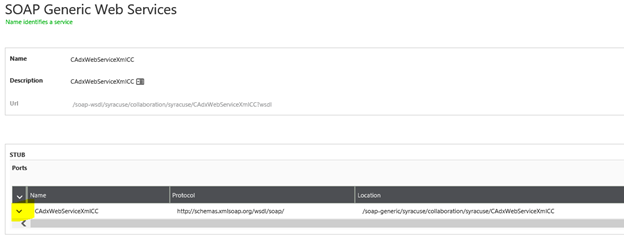
Click the on CAdxWebServiceXmlCC.
Click the down arrow on the left.
A list of operations is displayed. These correspond to the operations from the web-based SOAP tester.

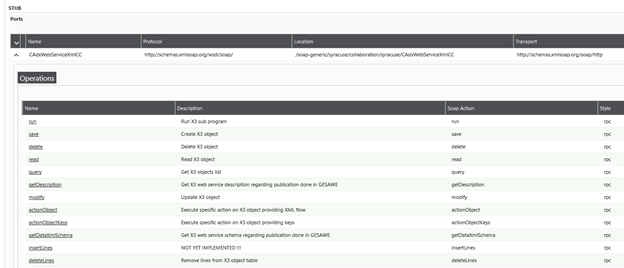
Web Service Description

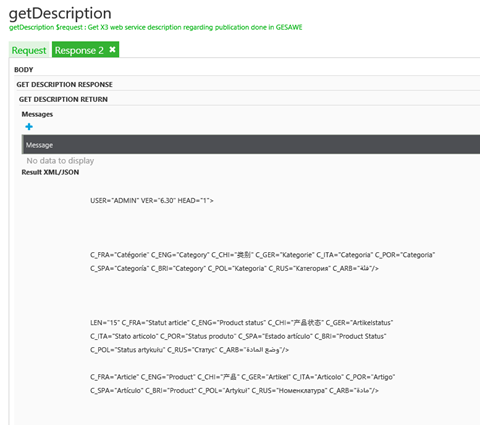
The getDescription operation returns the web service description. Click the getDescription option, and enter the Language, Pool alias and Public name.
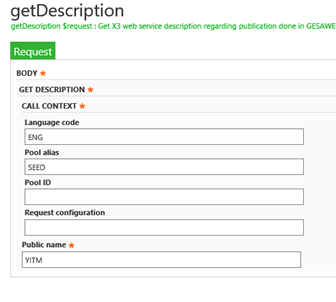
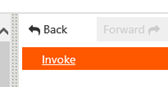
Click Invoke.
The web service description is displayed.

QUERY OPERATION

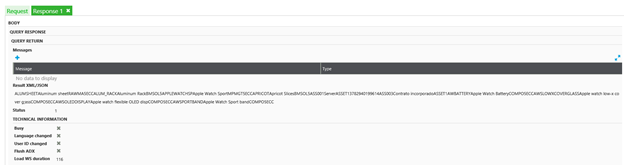
The query operation is the same as the list operation. Click the query option, and enter the Language code, Pool alias and Public name. Change the list size from 0 to the desired results size.
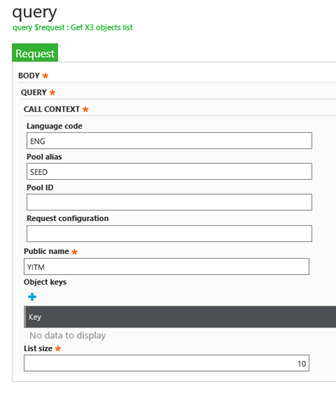
Click Invoke.
The results will appear in the Response tab.

Entradas populares de este blog

SAGE X3 SILENT IMPORT (IMPORTSIL) WITH ERROR CATCHING

FUENTE ORIGINAL: https://pluginx3.com/en/blog/post/sage-x3-silent-import-importsil-with-error-catching.html You already know how to manually generate a CSV file in order to import it threw a template in Sage X3. But If you wonder how to catch detailed errors after a silent import here is the solution. Sometimes you need to catch the incoming errors in order to alert the end-user regarding an issue. Closed period, wrong date etc …. Unfortunalty the standard Sage X3 silent import function doesn’t natively show the detailed errors during the import process. Call IMPORTSIL([M:IMP2]MODIMP,[M:IMP2]NOMIMP) From GIMPOBJ And the standard function ERR_IMPORT will only show the overall status of the importation and not the detailed errors. IMPORTSIL function is pushing all the log data into a tracefile in order to avoid any popup on end-user screen. So you have a log file available in order to search for errors in it. Sage X3 runtime is using the same principals standards as any shell for log...

Valores de fstat

Fstat fstat  is a numeric status that is returned upon execution of a database operation, a sequential file operation, or a lock instruction. Syntax fstat Examples # MYTABLE is a table with a key called KEY1, that has a unique component called KEYVAL # Create a record in the table MYTABLE with they key value 1 if it doesn't exist Local File MYTABLE [MYT] Read [MYT]KEY1=1 If fstat [MYT]KEYVAL=1 : Write [MYT] If fstat MSG="The key was created in the mean time" Else MSG="Key created" Endif Else MSG="Key already exists" Endif Details fstat  is always set to '0' if the operation is successfully completed, and has a non-null value if there is an error: In a sequential read ( Getseq  and  Rdseq ),  fstat  is set to '1' at the end of the file. On  Lock ,  fstat  is set to '1' if the lock could not be performed. For a database operation ( Read ,  Look ,  Readlock ,  For ,  Write ,  ...

How To Add a Custom Selector for the Screen Field

Fuente original del artículo:   https://www.rklesolutions.com/blog/how-to-add-a-custom-selector-for-the-screen-field January 5, 2022 By RKL Team Leave a Comment There may be times when you want to add a pop-up window to select a field for a screen. Sometimes this can be handled automatically if the field is a standard X3 object field (i.e. when selecting a product with a type of ITM from the ITMMASTER table). There may be other times where a standard look-up is not available, and some custom code is required to do the selection window. We'll show you how to add a custom selector of your choosing to the screen field. ADD SELECT ON SCREEN FIELD The first step is to add the appropriate code to the field on the screen in Sage X3: Go to  Development > Script Dictionary > Screens Select Your Screen Select the field to have the lookup for  by moving your cursor to it on the screen. The field should show with a blue background. Select a type of "Selection" , and an  ac...